Contacts
The contacts application helps you to access all your contacts in one place. It makes it simpler for you to manage Personal and Organization contacts inside your email interface.
The Contacts application is available in the left Apps pane in your NICeMail account. You can add, save and easily access your contacts from the Contacts app. The entries in the contacts application automatically appear in your Address book for sending emails, and are also available in various other places like Search etc.
Note:
You will not be able to view Contacts features in NICeMail if your Delegated/ Department administrator has disabled your access to the Contacts application.
Adding Contacts
Add Contacts directly
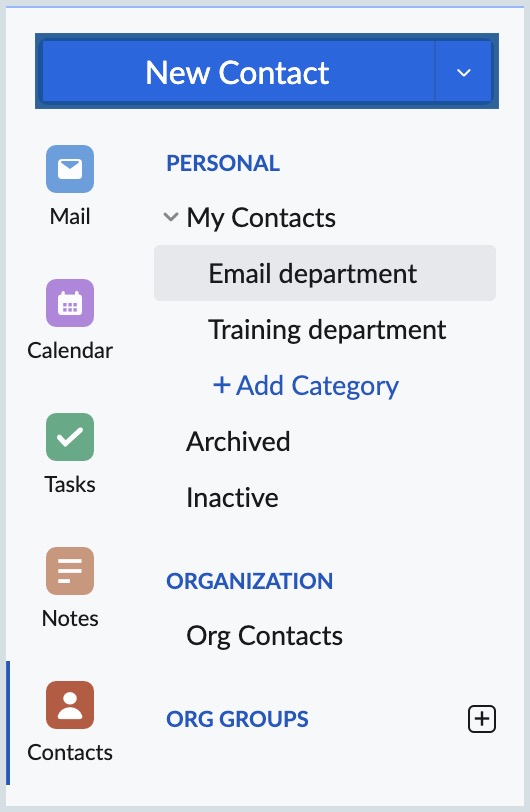
You can add a new contact using the New Contact option in the left pane. You can also use the drop-down menu, to create contact irrespective of the application you are currently in.
- Log in to https://mail.gov.in/
- Navigate to the Contacts application from the Apps pane.

- Click New Contact to add a new contact manually.
- Provide the First name, Last name, email address and phone number of the contact in the relevant fields.
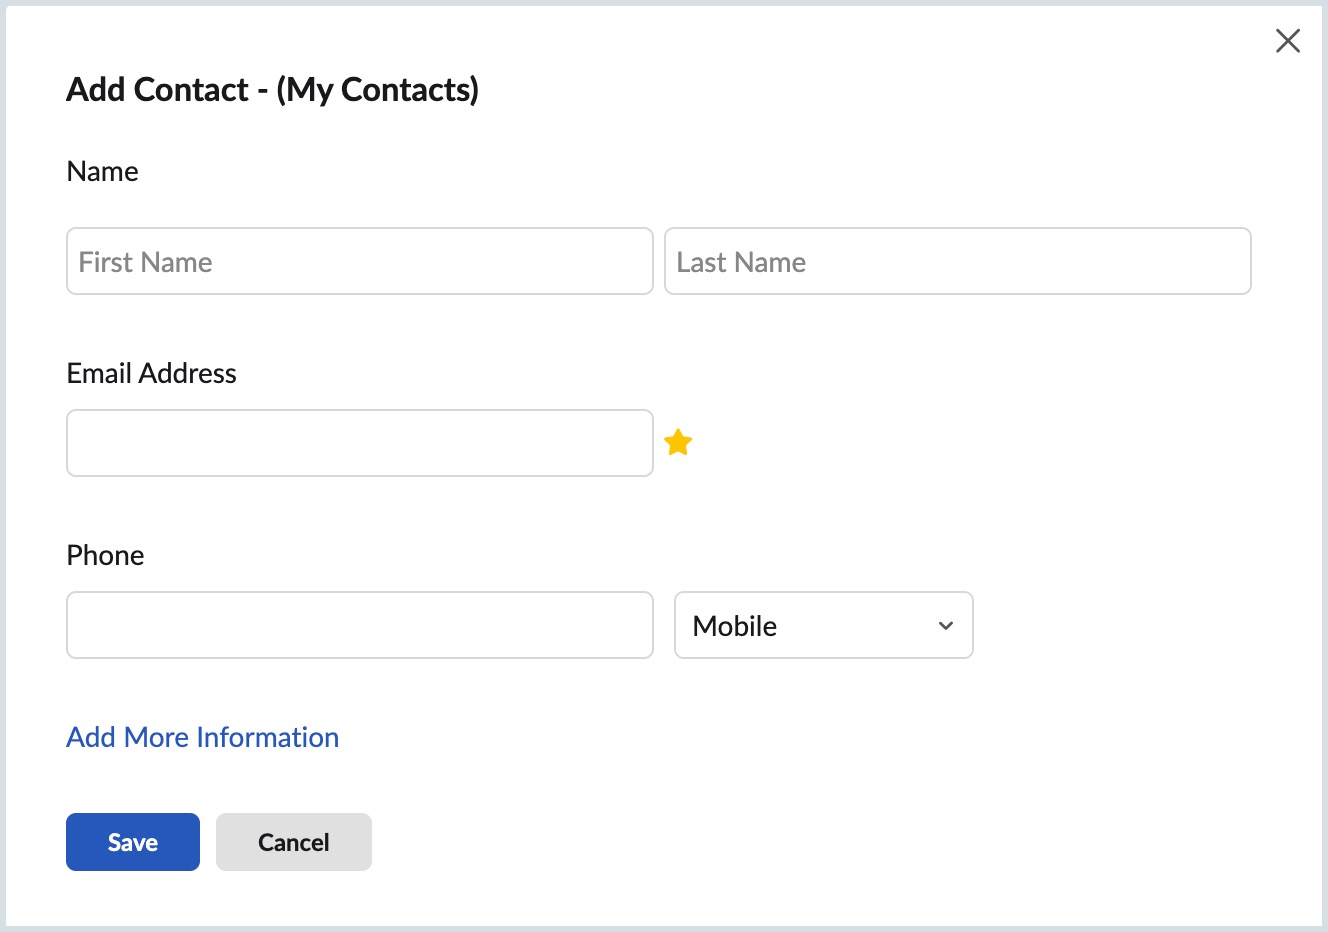
- Click 'Add more information' to provide more details about the contact like Web URL, Instant messaging profiles of the contact, Date of Birth and work/home addresses.
- Click Save to add the contact to your list.
You can repeat the steps to add contacts one by one to the address book manually.
Add Contacts from Email using the Contact Card
You can turn on 'Automatically add recipients to Contacts' to ensure that all the email addresses to whom you send emails get added to the contacts automatically without you having to do so manually.
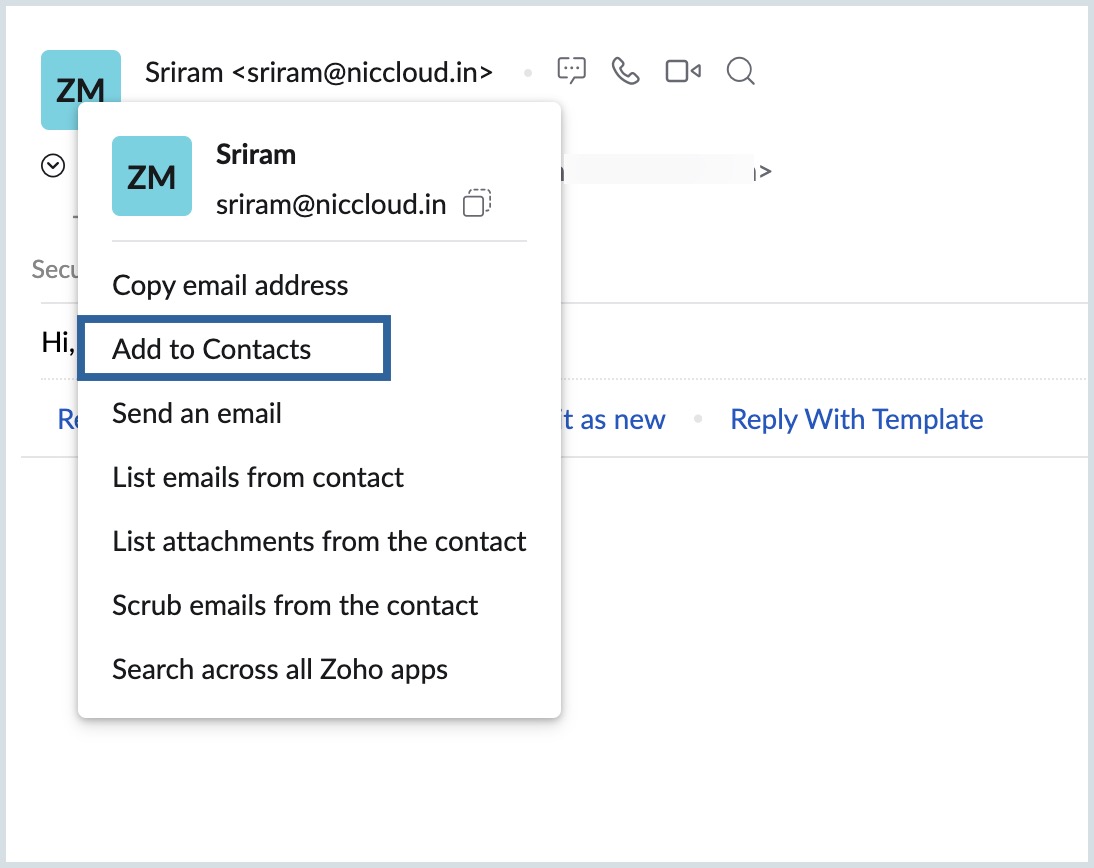
You can also make use of the 'Add to Contacts' option in the Contact card, to add them to your contacts. This is helpful in cases where you receive emails from someone who is not yet in your contacts or to even add other recipients to an email you have received. Click on the sender email address or the email address in To/ Cc of the email to view the 'Contact Card'.
Select 'Add to Contacts' from the options, to add them directly to your contacts.
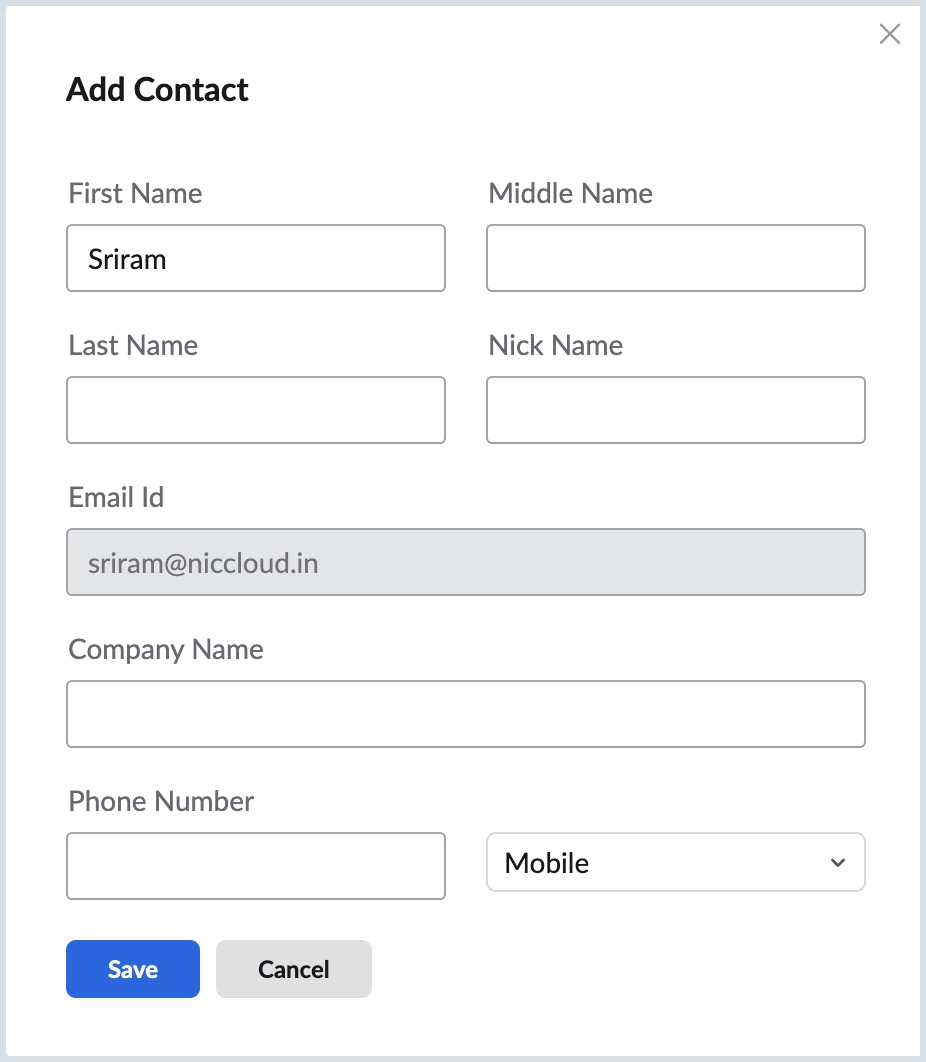
Add Contact pop-up will appear. Enter the First Name, Middle Name, Last Name, Nickname, Email ID, Company Name and Phone Number of the contact and click Save.
You can also start a Chat or audio/Video call with a contact directly from the Contact card using the respective icons displayed below the email address of the contact.
Contact Actions
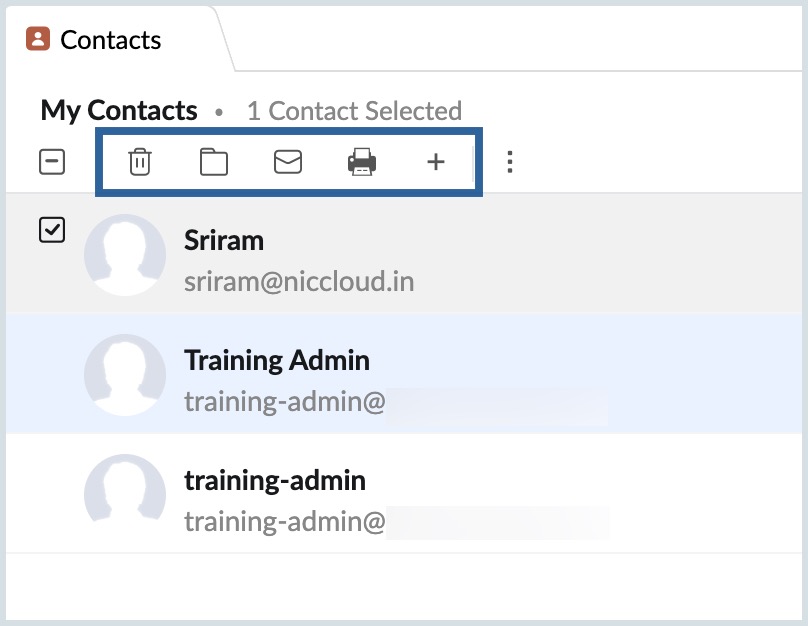
When you select a contact or multiple contacts from the listing, you can view the Actions associated with contacts. The following actions can be performed on the contacts :
Delete - Deletes the selected contacts from your account.
Add to - You can select a category to associate the selected contact.
Merge contacts - When you have multiple entries for the same contact, you can use Merge Contacts.
Send Mail - Opens the composer with the selected contacts in the To field as recipients.
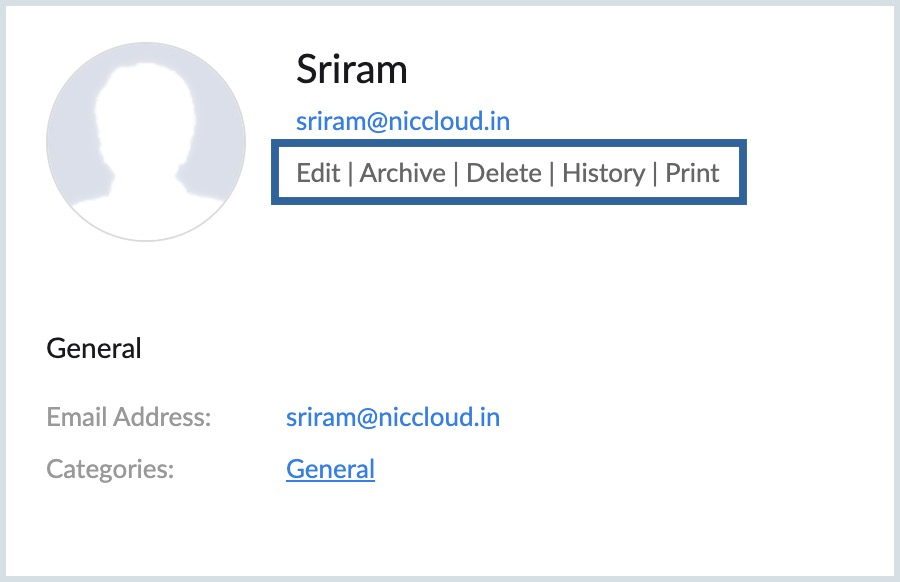
When you select a single contact, you can Edit, Delete or Print the particular contact.
You can quickly send an email or chat with a contact, using the options available right there. The Chat availability status is also indicated using the Red (Busy), Green (Available), Yellow (Idle) or Grey (Not logged in) dots.
Sort Contacts
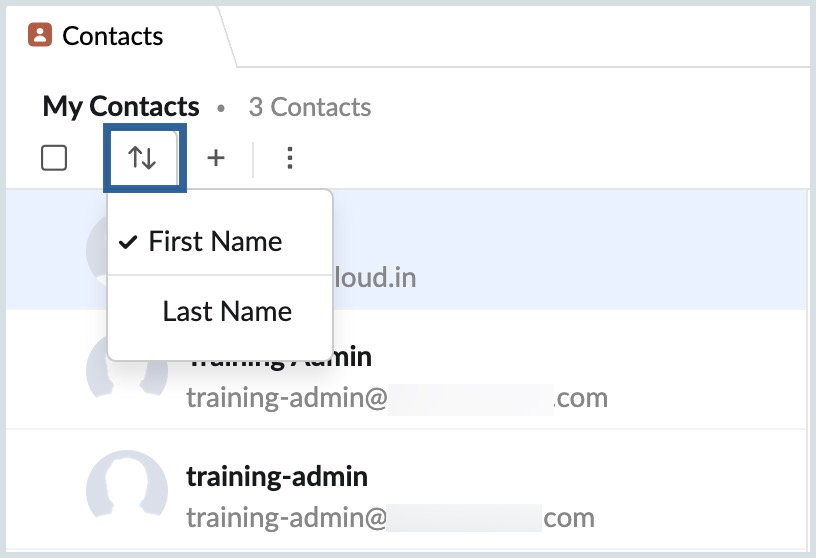
You can sort the contacts by First name or Last name. This helps you to view the contacts in your preferred order.
Import/ Export Contacts
You can export or import the contacts you want by clicking on the relevant option from the More Action drop-down in the Contacts app.
Import Contacts
You can use the 'Import' option to bulk-add the contacts to your NICeMail contacts. The import option is available to upload a file from your local system.
Import Contacts from the local System
- Log in to https://mail.gov.in/
- Navigate to the Contacts app and select Personal to add the contacts as your Private contacts.
(You can select a group, to import them directly to the group.) - Select 'Import' under More Actions.
- Click on 'Choose File' under 'Local Drive' to browse your system.
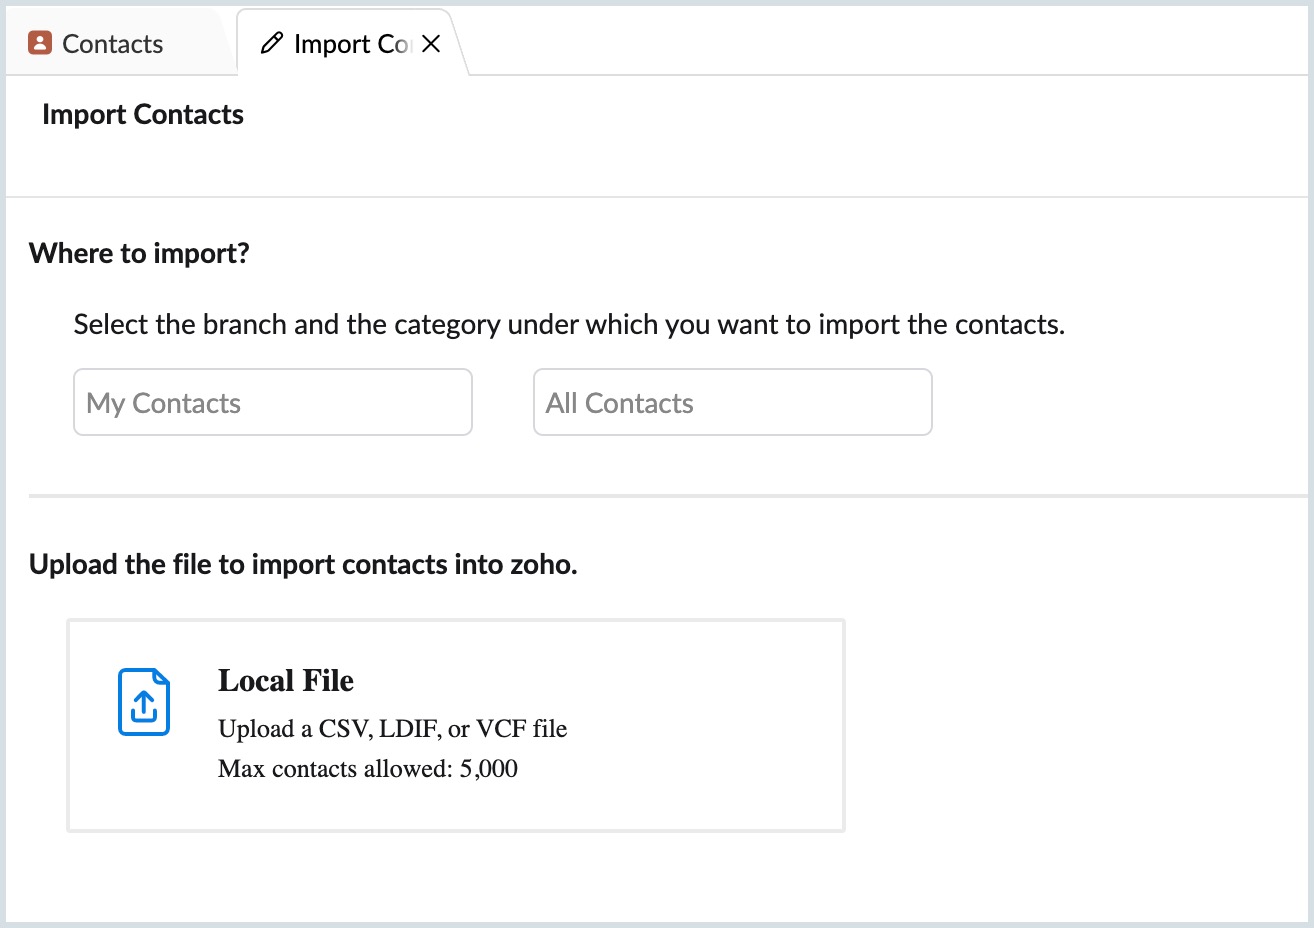
- Select the relevant CSV/ LDIF/ VCF file which you want to import.
- Map the different fields in the imported file, to the respective fields in the Contacts and click Next.
- Select a category, in case you want to import the new contacts to a particular category and click Next.
- Select Done to complete the process.
A summary of the Import process will be displayed on completion.
Note:
The imports contacts feature is available based on the policy assigned to your organization.
Export Contacts
- Log in to https://mail.gov.in/
- Navigate to the Contacts application from the Apps pane.
- Select the Export option under More Actions.
- Select whether you want to export Personal contacts or Organization contacts or contacts from a specific group.
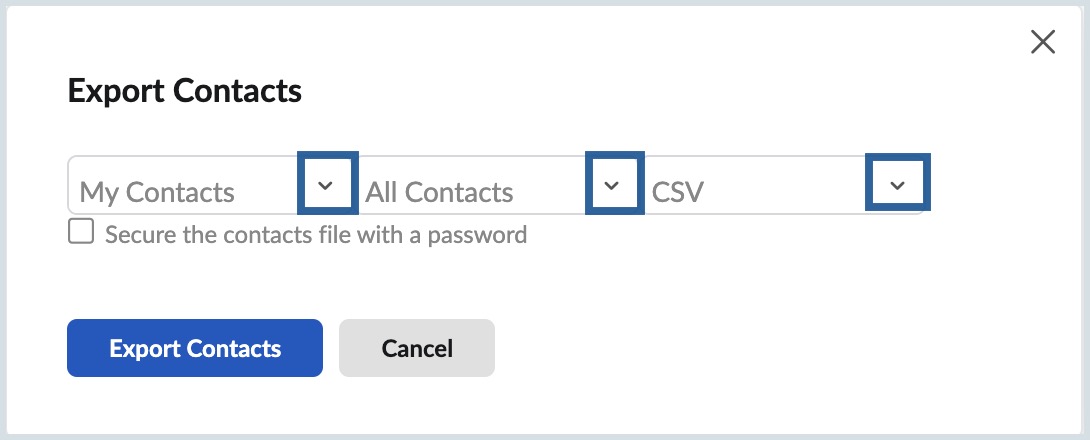
- In case you want to export a specific category, select it.
- You can export the contacts to CSV/ VCF/ LDIF/ HTML or Outlook CSV formats.
- Based on your requirements, choose the format you prefer.
- After choosing all the preferred options, select Export Contacts.
The file in the chosen format will be downloaded after the export process. You can also export specific categories using the 'Export' option in the right-click menu.
Note:
- While exporting the contacts, you can encrypt the file with a password by selecting the Secure the contacts file with Password checkbox in the Export pop-up.
Note:
The export contacts feature is available based on the policy assigned to your organization.
Clean Duplicates
When you add or import contacts, having duplicate contacts becomes inevitable. The clean duplicates option helps you to detect and clean the duplicate contacts in your account.
Select 'Clean Duplicates', to view the list of contacts that seem to be duplicated.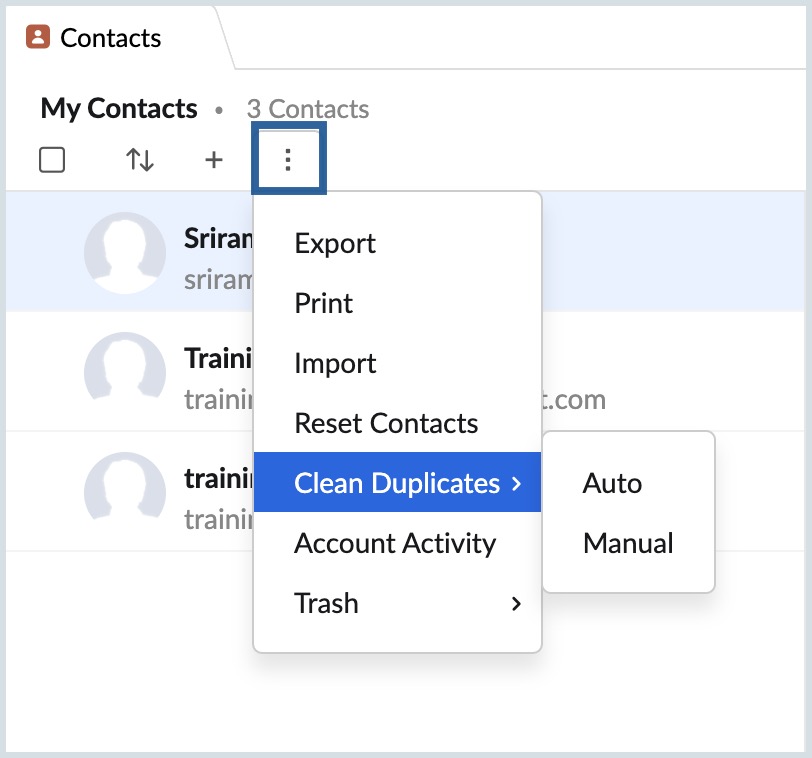
You can choose to Merge, Delete or skip an action for each duplicate contact.
Note:
Only the Delegated/ Department administrator can manage/ edit/ delete the contacts in the Organization contacts.
Reset Contacts
You can select 'Reset' Contacts, to delete all the contacts in the particular section and start afresh. Once you use the Reset Contacts option, you will not be able to recover the lost contacts.