Managing Tasks
Invite users
- Login to https://mail.gov.in/ and navigate to Tasks.
- Open the task you want to invite new users to.
- Click the + icon at the bottom of the Task.
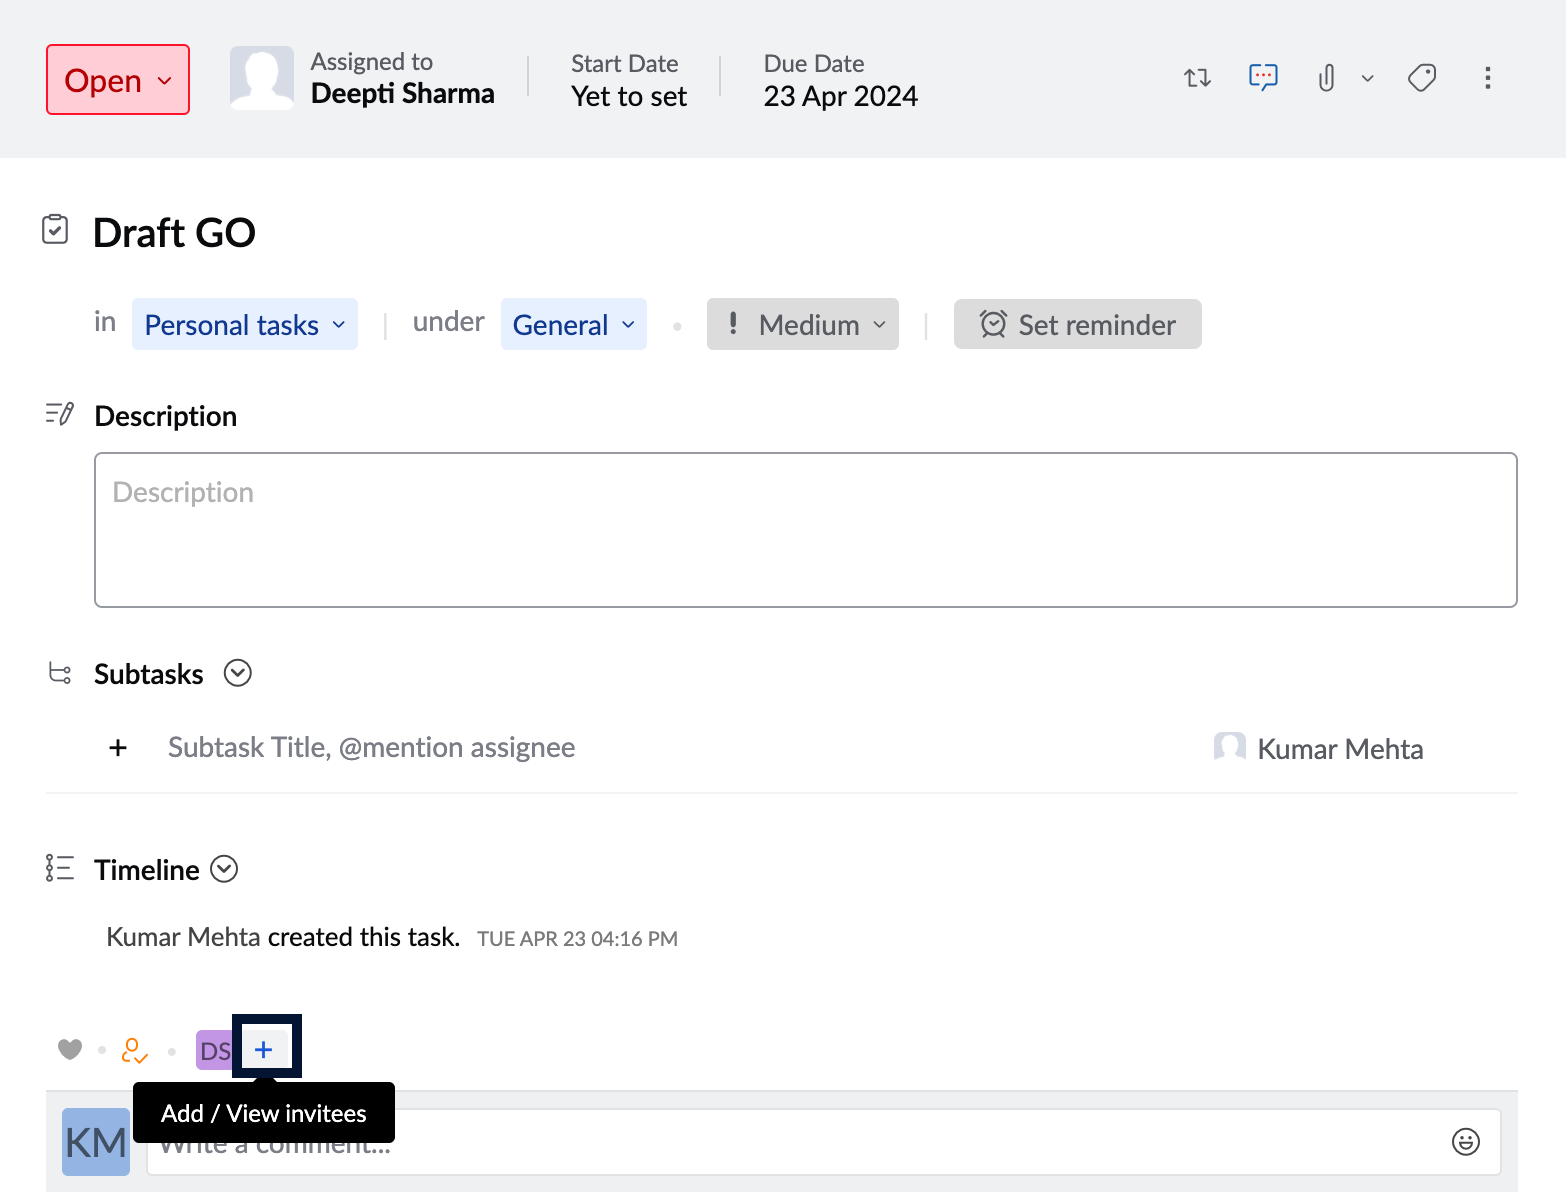
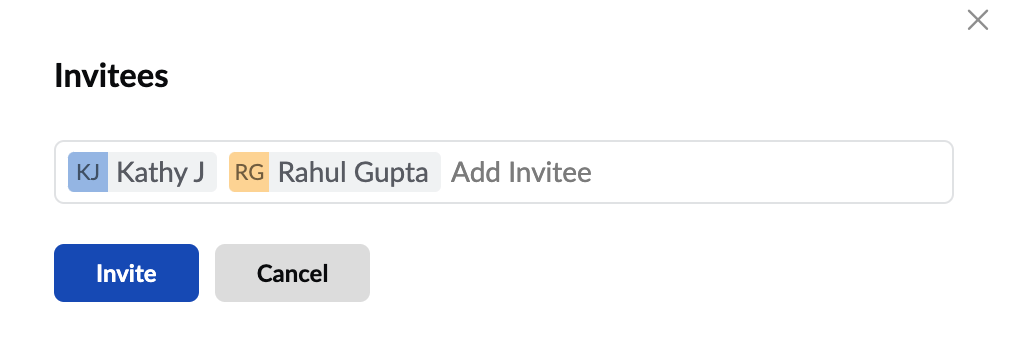
- In the Invitee pop-up, enter the names of the users you want to share the task. You can add more than one user at once.
- After adding the names of all invitees, click Invite.
You can also invite users by simply tagging them in the comments section of a task. To invite users via comments,
- Open the task you want to invite new users to.
- In the comments section, @ mention the respective users. And then click Comment.

Categories
Create via LHS menu
- Login to https://mail.gov.in/ and navigate to Tasks.
- You can create categories for your Personal tasks.
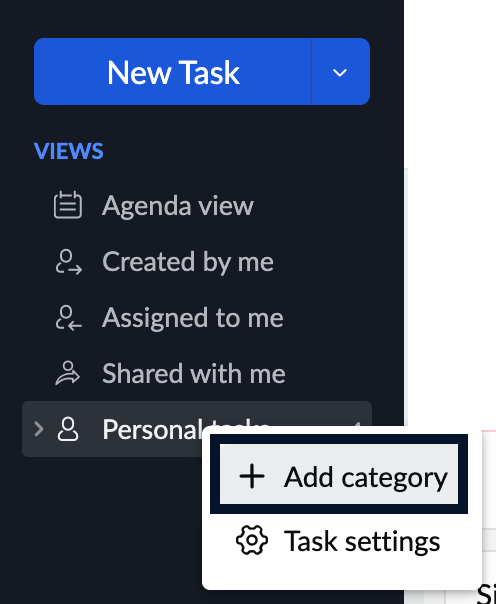
- To create a Category for Personal tasks, right-click Personal Tasks in the left-hand side pane.
- Click Add Category.
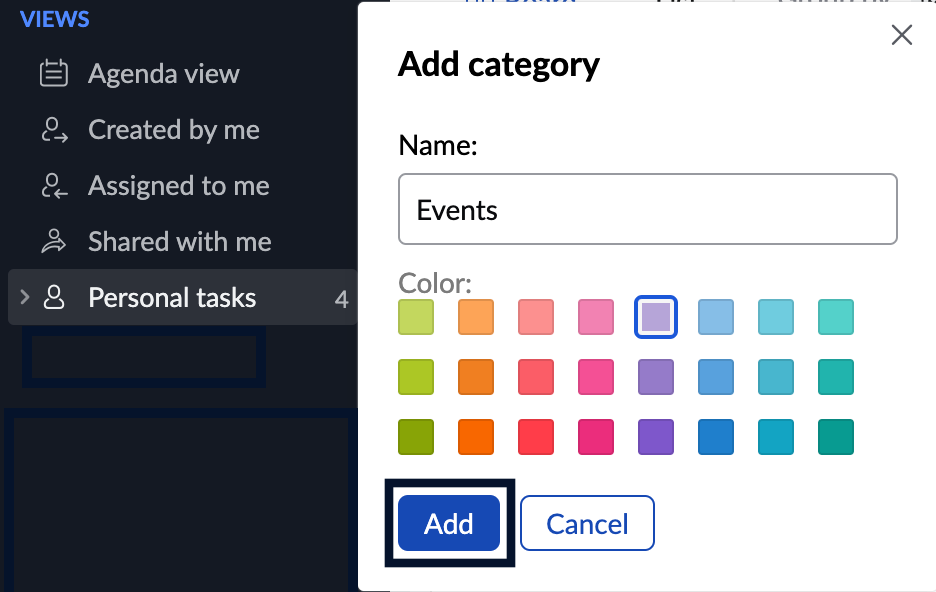
- Enter your Category name and then click Add. You can also choose a color to associate it with the group by clicking on the color of your choice.
Create via Task settings
- Login to https://mail.gov.in and navigate to Tasks.
- If you want to add new Categories for your Personal tasks then select Personal tasks from the LHS menu.
- Click the More Actions icon and navigate Task settings.

- Under the Task Settings, navigate to the Category section.
- Type in the name of your Category in the 'Search or Create a new category' text box.
- Once done, click Create. You can also associate a color with your Category by clicking on the color box.
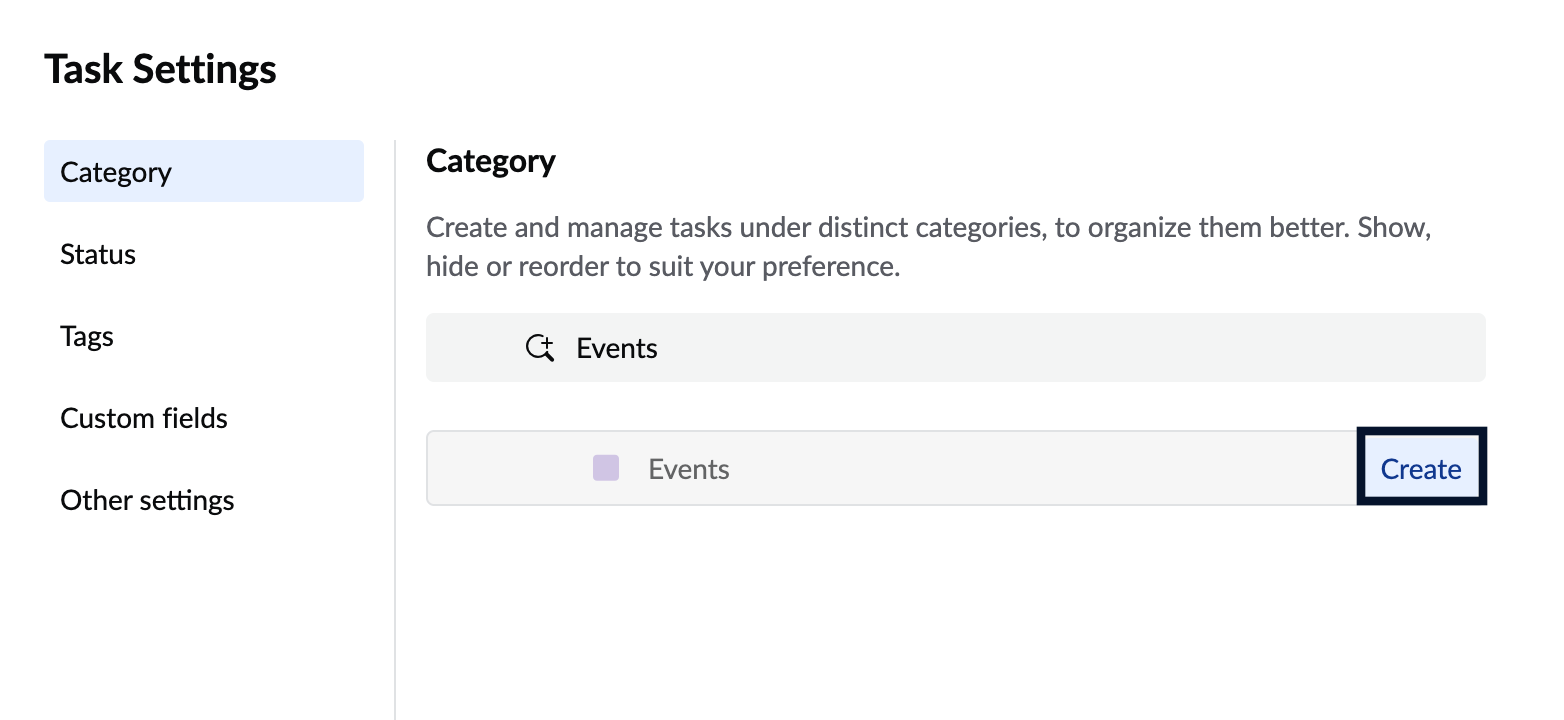
You can view the Categories associated with your Personal tasks listed under them in the left-hand side pane. Alternatively, you will be able to view the task settings from the left pane too.
Add Task under a category
To associate a Task under a category,
- Login to https://mail.gov.in/ and navigate to Tasks.
- Open the task you want to map under a Category. It can be a new task or an existing task.
- Click the drop-down list next to the under option.
- Select the Category of your choice.

You have now successfully mapped your task under a Category. This will allow you to access them faster and makes organizing easier.
Delete a category
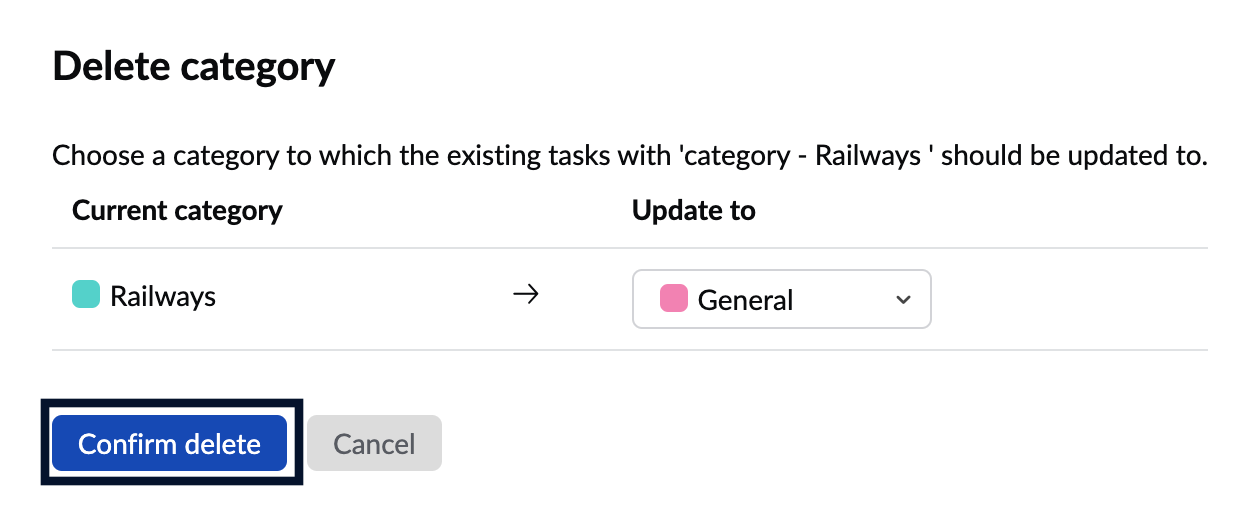
When you delete a category under Personal Tasks you'll be given the option to move your tasks to a different category under Personal Tasks.
To delete a category and move tasks to a different category, navigate to the category under Personal tasks in the left menu. Right-click on the category you want to delete and choose Delete category from the contextual menu. Choose the category to which you want to move the tasks to and click Change.
Add label/tag to a Task
- Login to https://mail.gov.in/ and navigate to Tasks.
- Open the task you want to assign a Label to. It can be a new task or an existing task.
- Click the Label icon. It will open the list of Labels you have created.
- Choose the labels you want to associate with your task. You can add more than one label to a task.
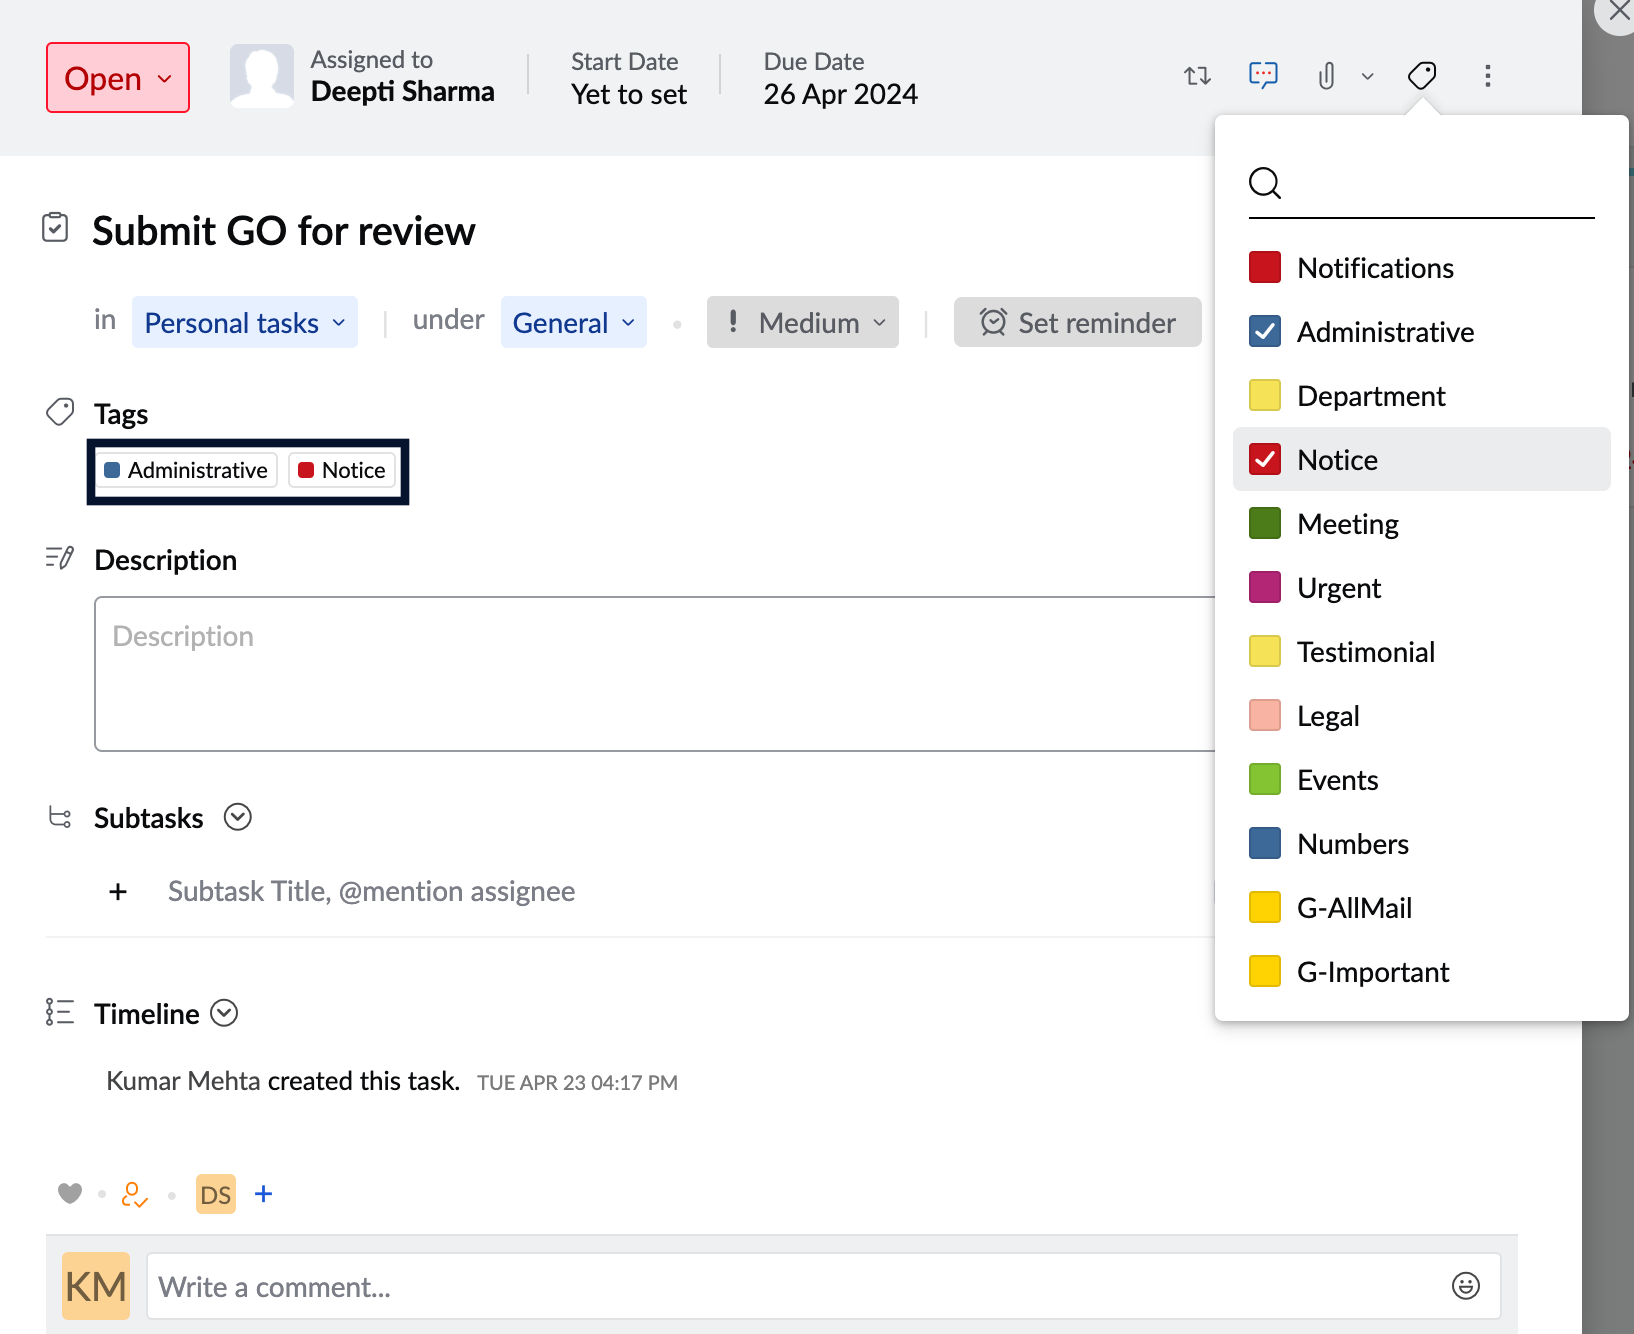
- Click Save, in case of a new task.
The Labels you associated your task with will be displayed in the Label section of your Task.
Set priority to tasks
- Login to https://mail.gov.in/ and navigate to Tasks.
- Open the task you want to set Priority. It can be a new task or an existing task.
- Click the Priority icon. You can set Priority to High, Medium, or Low.
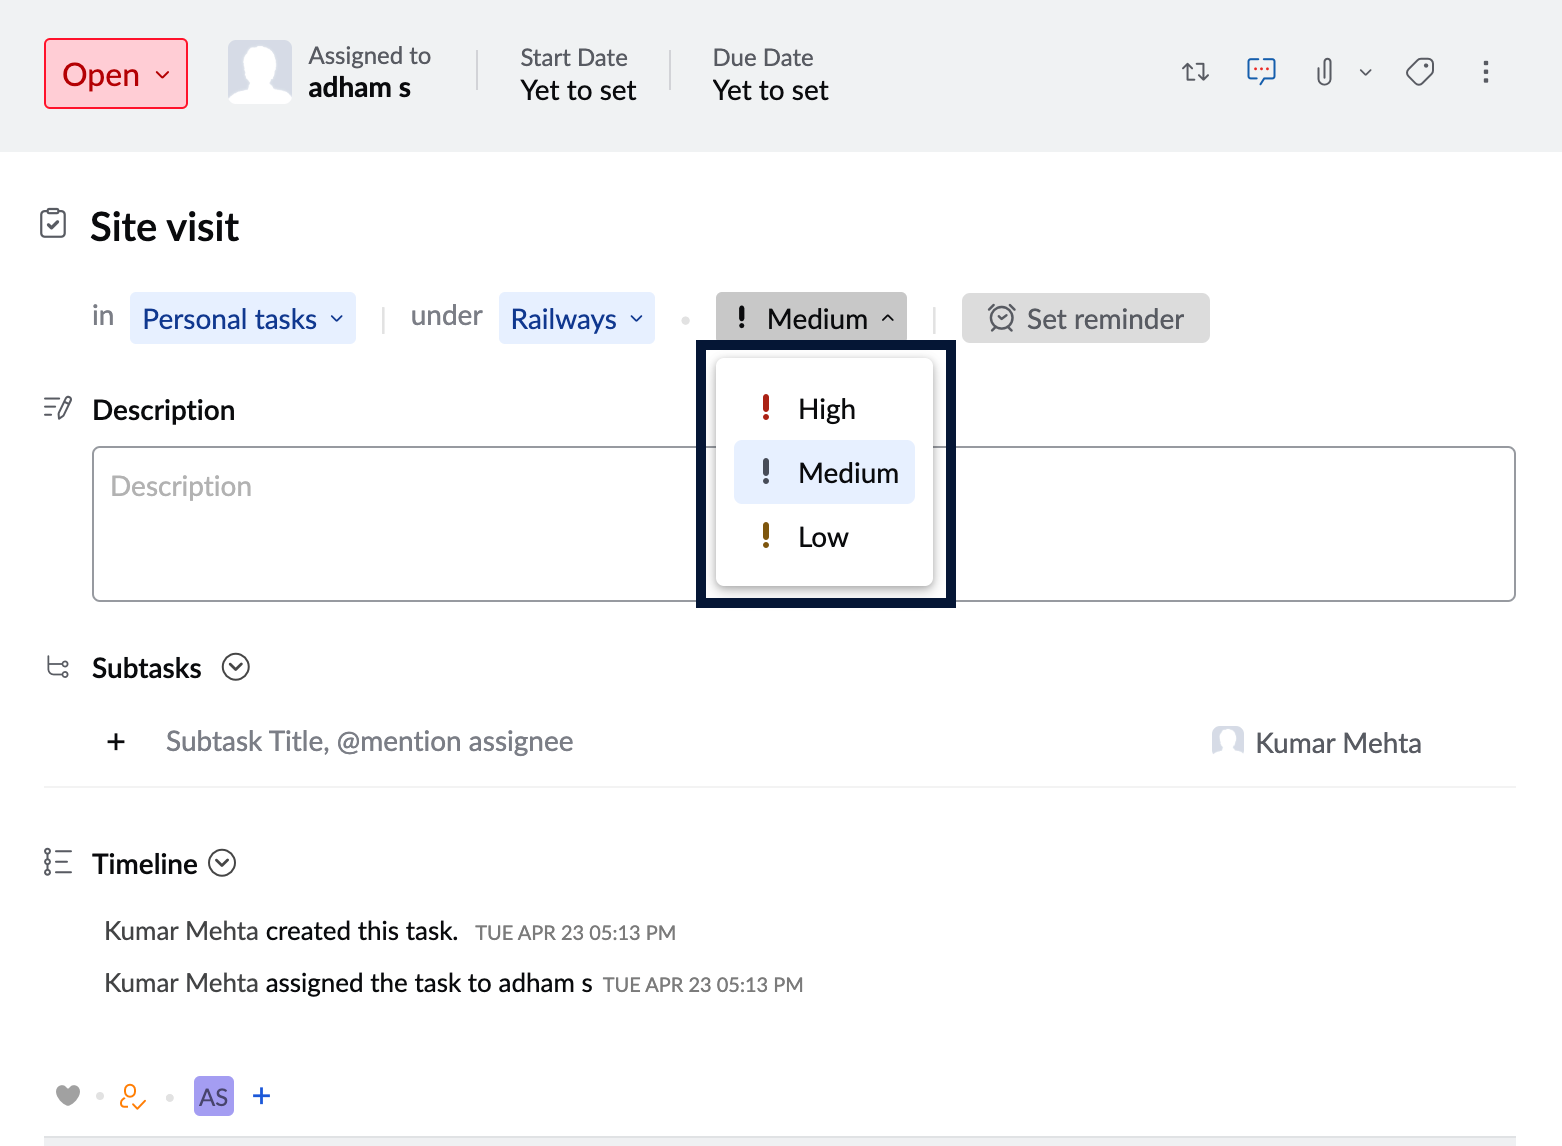
- Once done, click Save, in case of a new task.
Task status
Mark a task as complete
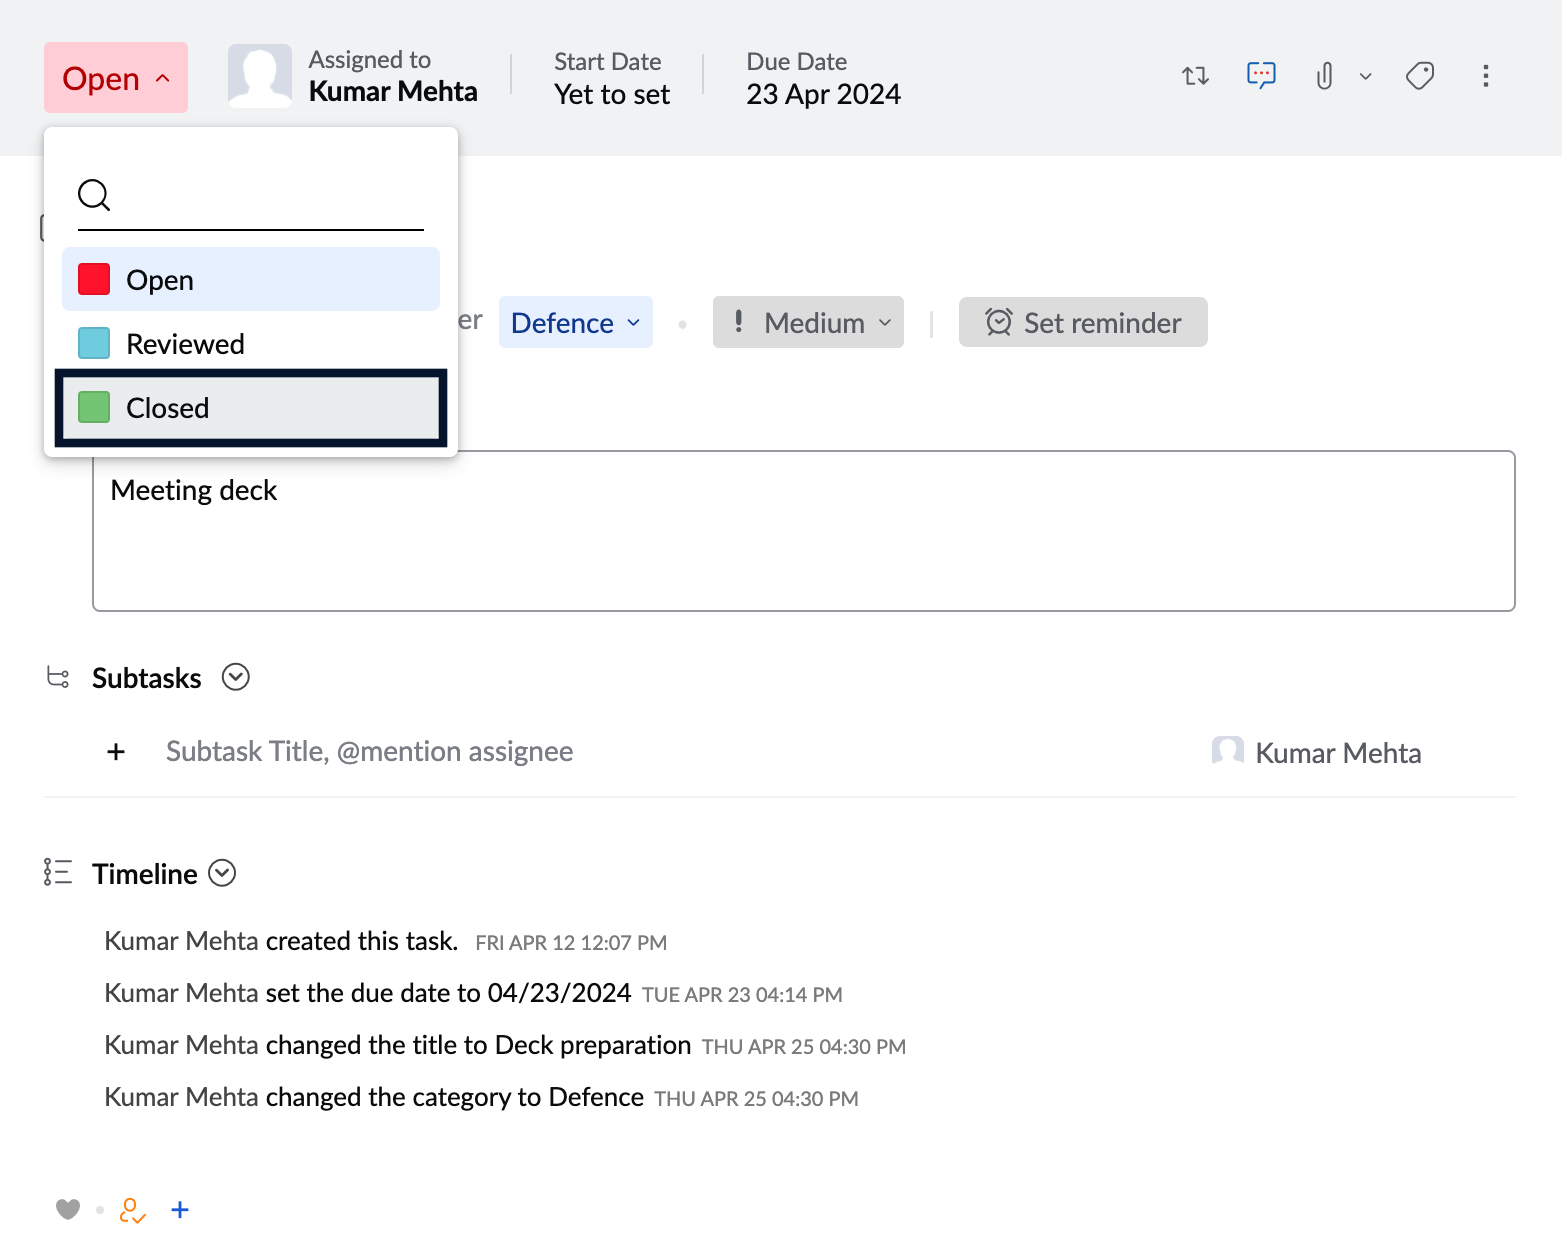
You can mark a task as complete by changing its status to Closed. Apart from closing a task, you can also set it to different custom statuses that you create using the same steps.
To mark a task Closed in Tasks
- Login to https://mail.gov.in/ and navigate to Tasks.
- Open the task you want to close or mark as complete.
- In the top left corner of the task, click the Status field.
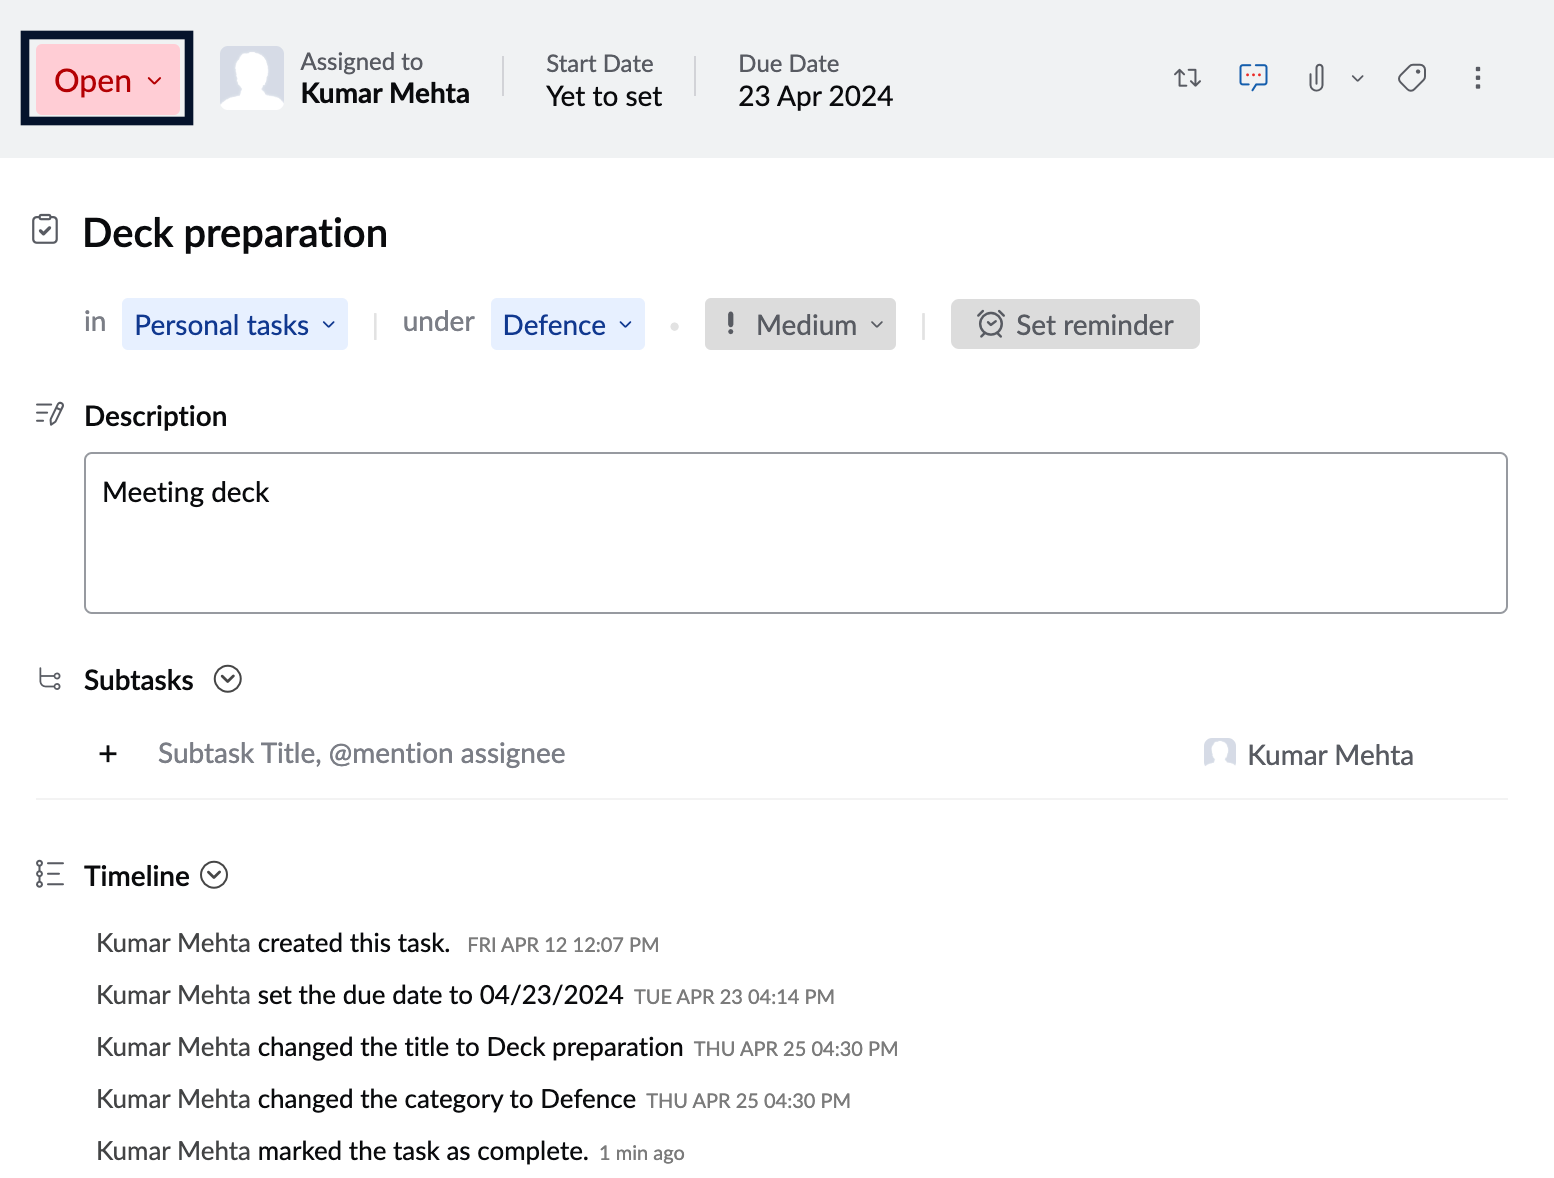
- Change the task status to Closed.
Create custom status
- Login to https://mail.gov.in/ and navigate to Tasks.
- If you want to create a custom Status for your Personal tasks then select Personal tasks from the LHS menu.
- Click the More Actions icon and navigate Task settings.

- Under the Task Settings, navigate to the Status section.
- Enter the name for the status, choose the color of your choice.

- Click Create.
Copy Tasks
When you copy a task from one location to a different location, the task will be duplicated and placed in the new location and can be found in the original location as well. To copy a task,
- Login to https://mail.gov.in/ and navigate to Tasks.
- Open the task you want to copy to a different location.
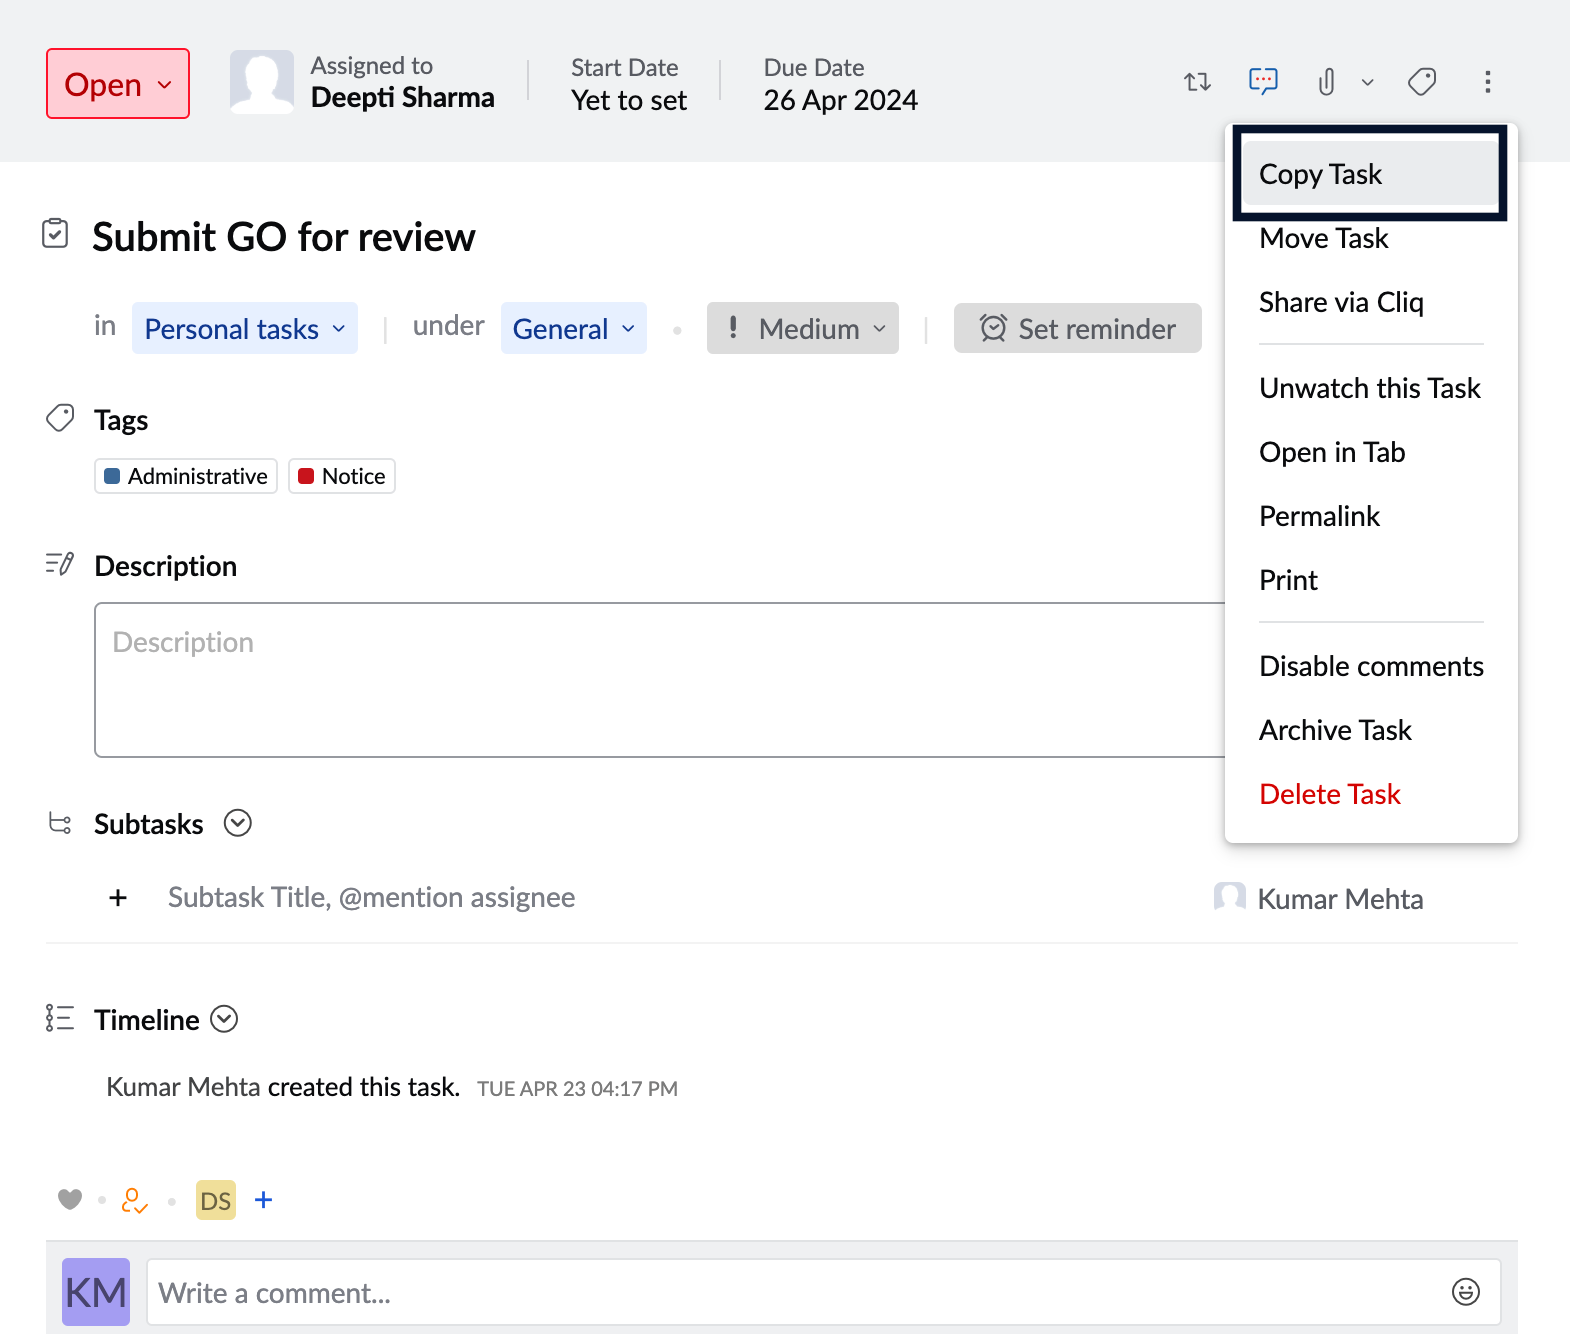
- Click the More Actions icon and select Copy Task.
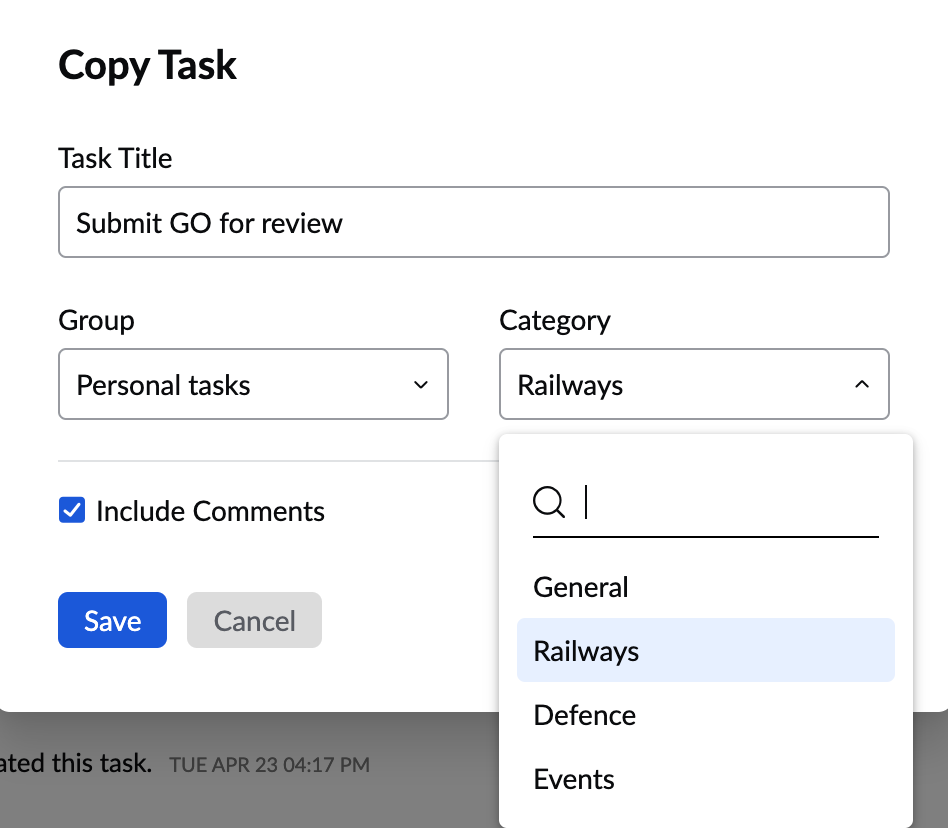
- Select the Category. You can choose to include the original task's comments by checking the Include comments checkbox.
- Once done, click Save.
Move Task
When you move a task, it will get moved from the original location to the new location. That is, the task will not exist in the initial location and can only be accessed from the new location you move it to.
- Login to https://mail.gov.in/ and navigate to Tasks.
- Open the task you want to copy to a different location.
- Click the More Actions icon and select Move Task.
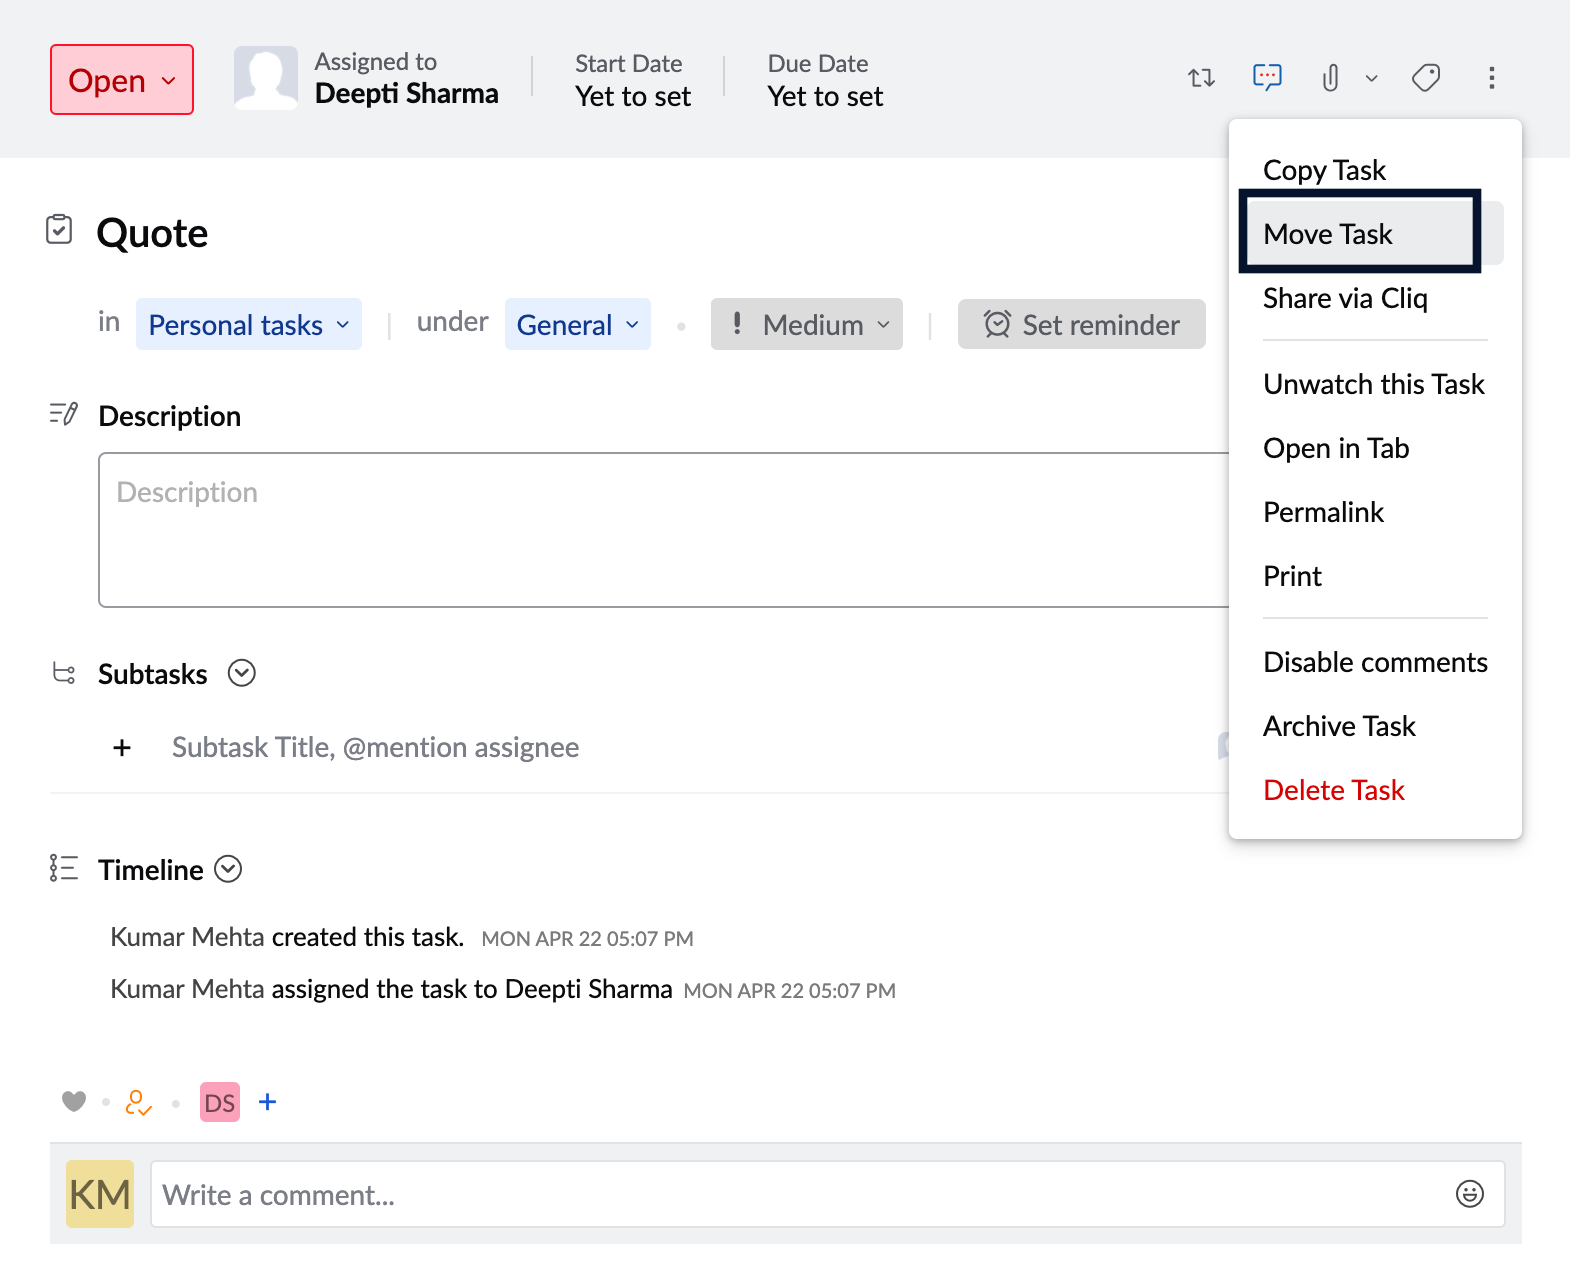
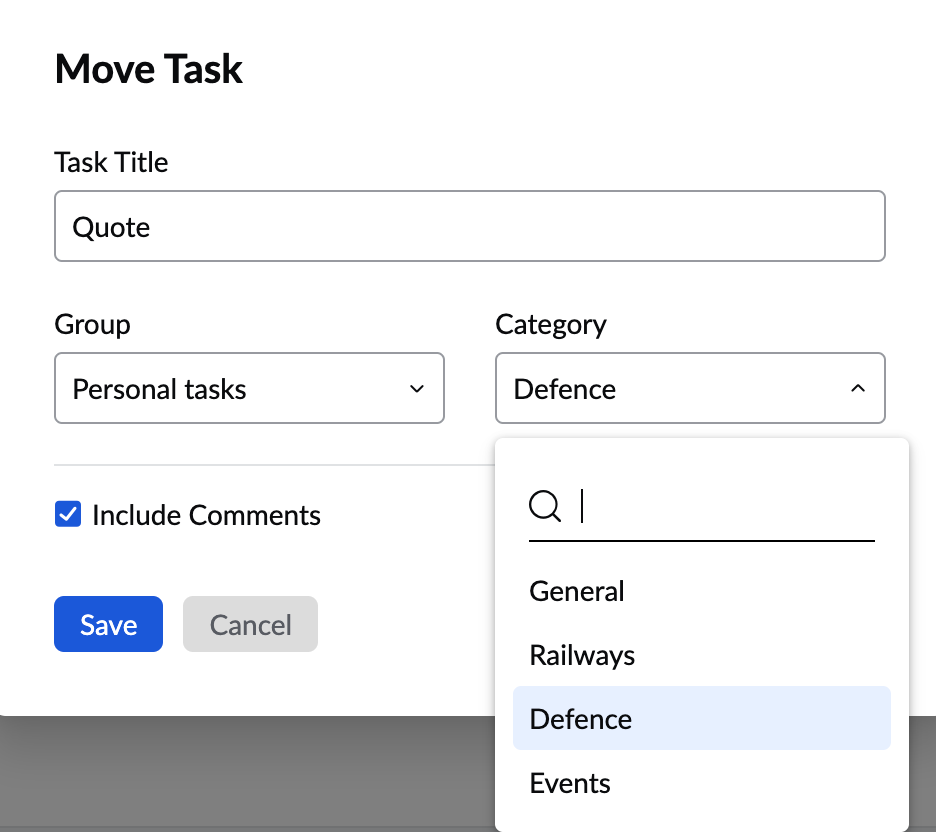
- Select the Category. You can choose to include the original task's comments by checking the Include comments checkbox.
- Once done, click Save.
Miscellaneous actions
Print Tasks
- Login to https://mail.gov.in/ and navigate to Tasks.
- Open the task you want to print.
- Click the More Actions icon and select Print.

- In the pop-up window, click Print.
Archive Task
When you archive a task, it will be moved to the archive section. You can access the archived tasks by clicking the Filter icon.
- Login to https://mail.gov.in/ and navigate to Tasks.
- Open the task you want to Archive.
- Click the More Actions icon and select the Archive Task.
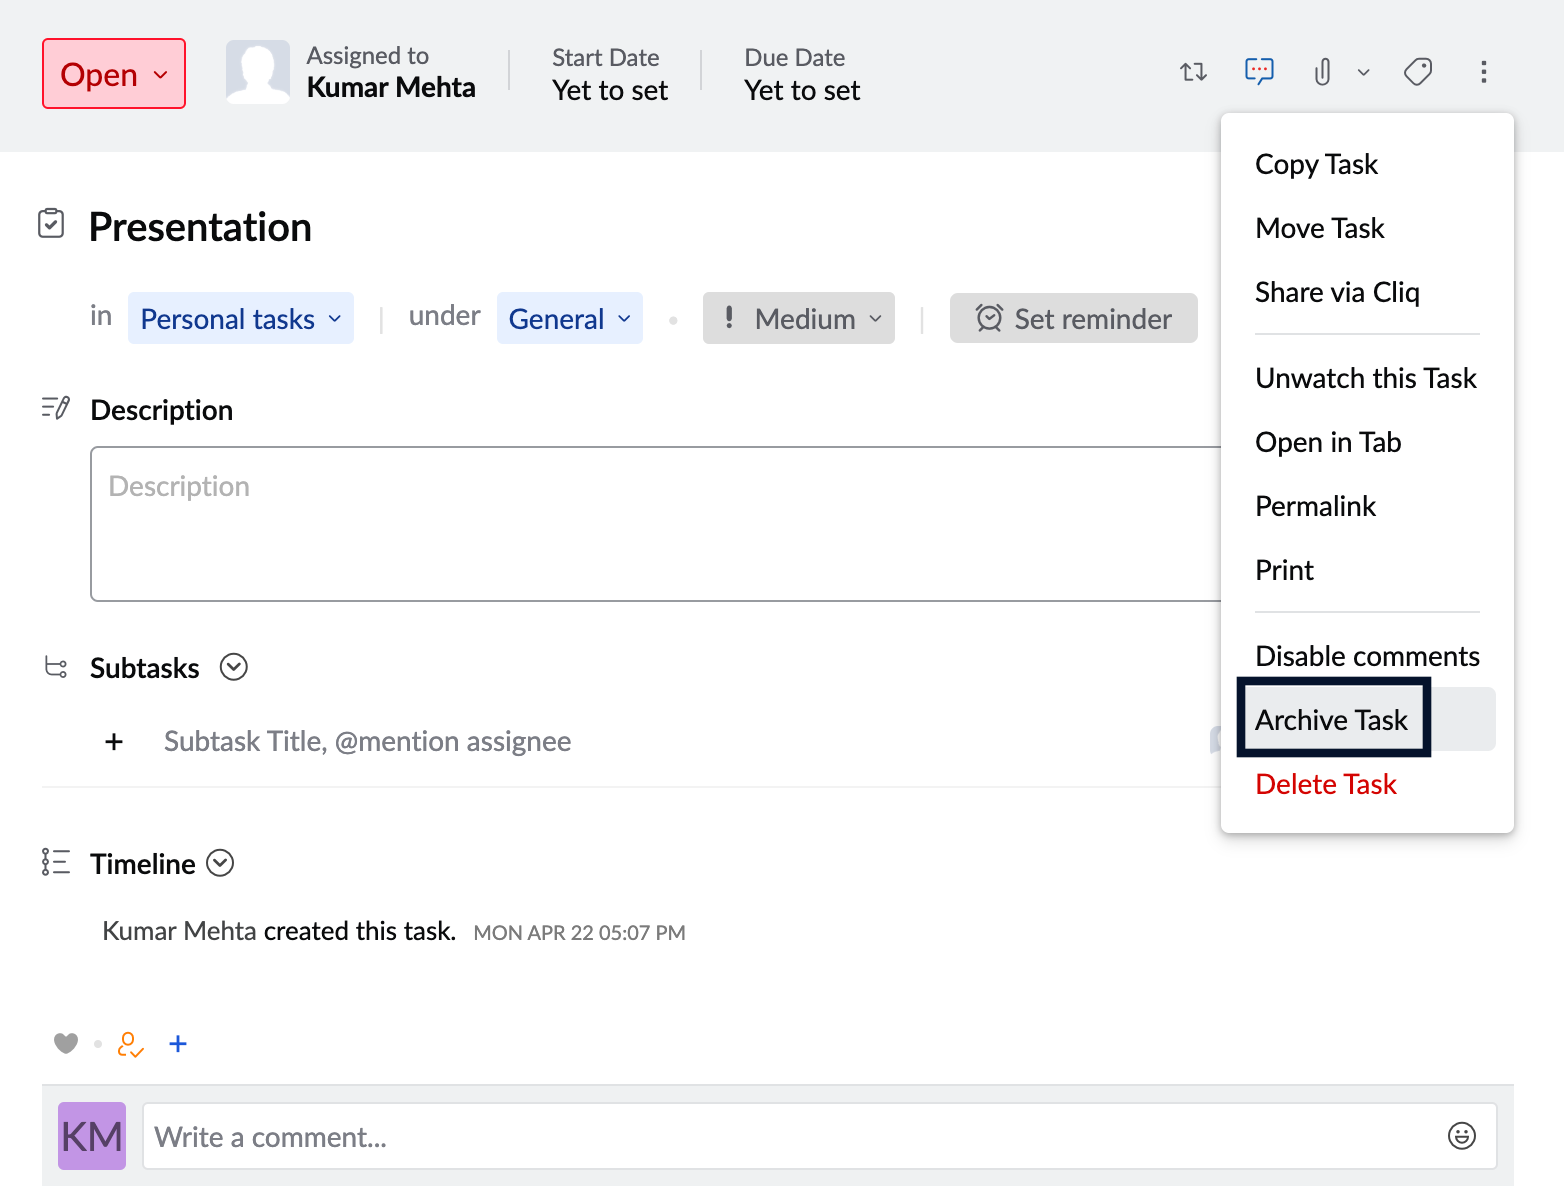
- In the pop-up, click Archive.
Delete tasks
- Login to https://mail.gov.in/ and navigate to Tasks.
- Open the task you want to delete.
- Click the More Actions icon and select the Delete Task.
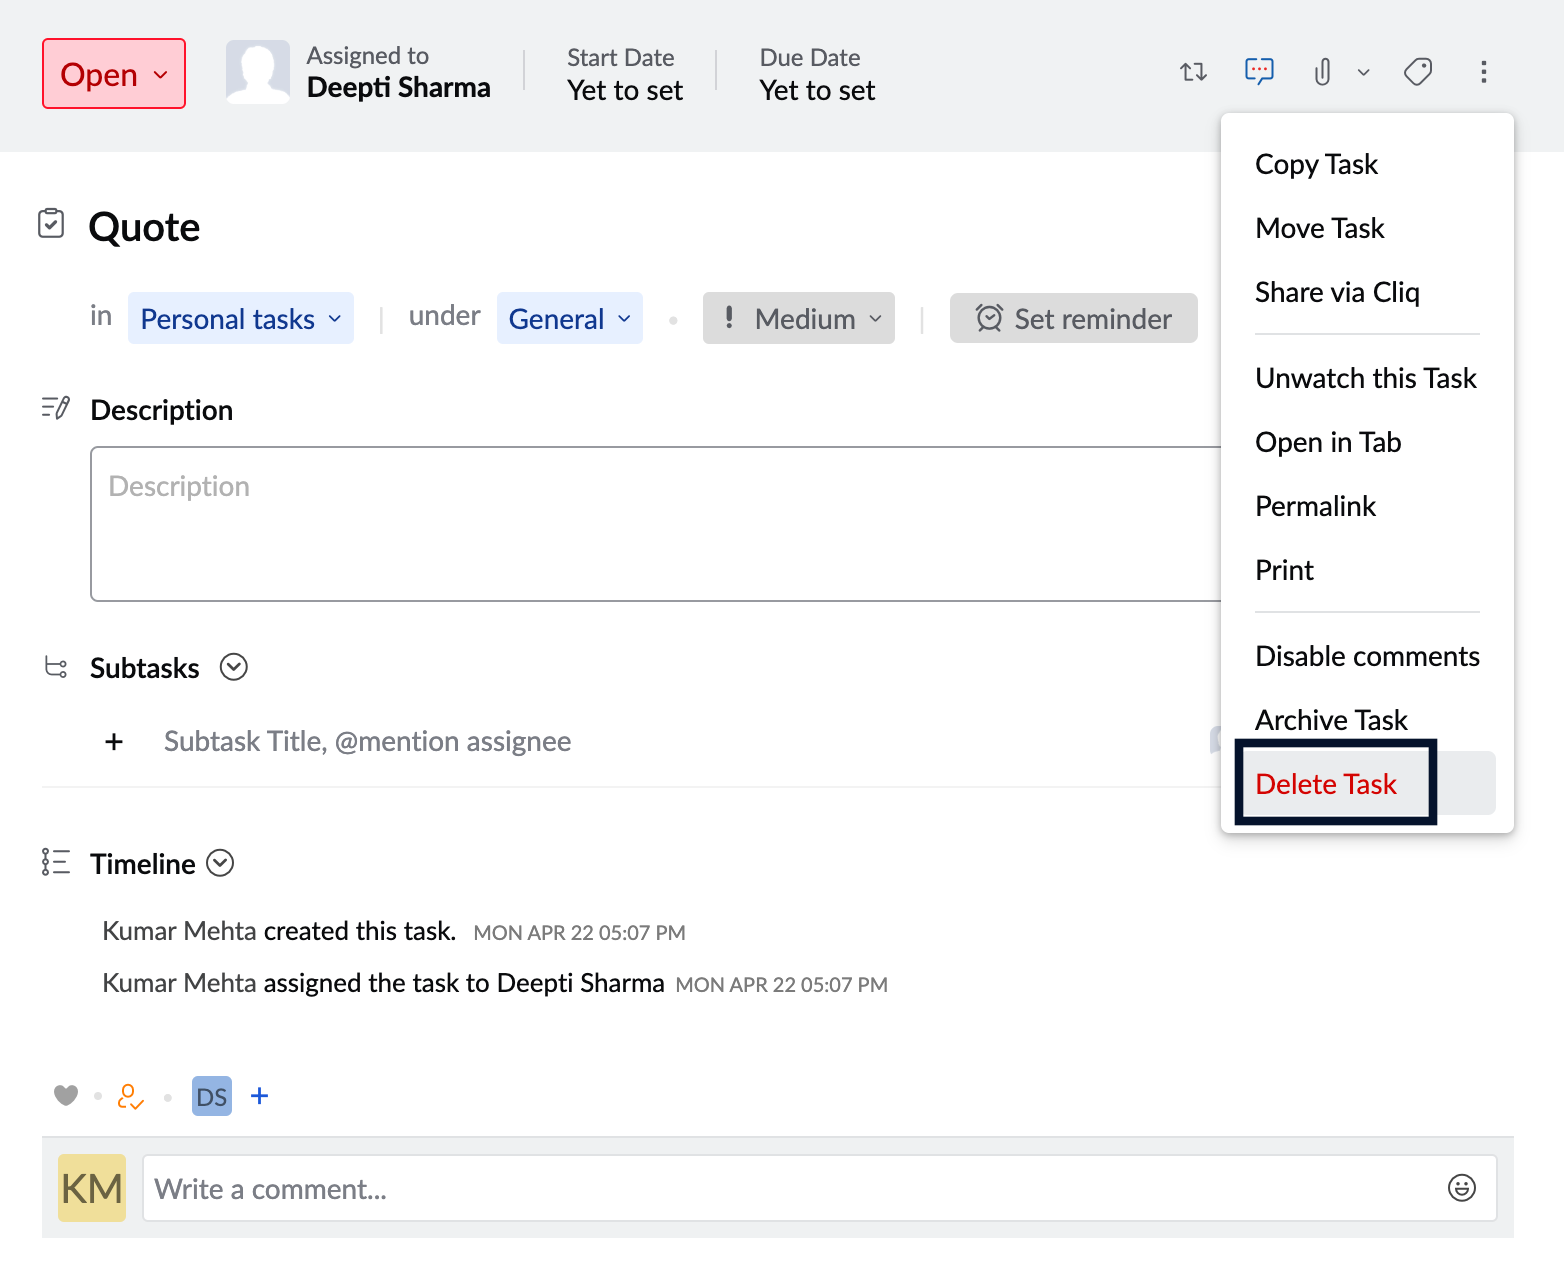
- In the pop-up, click Delete.
Watch or unwatch Tasks
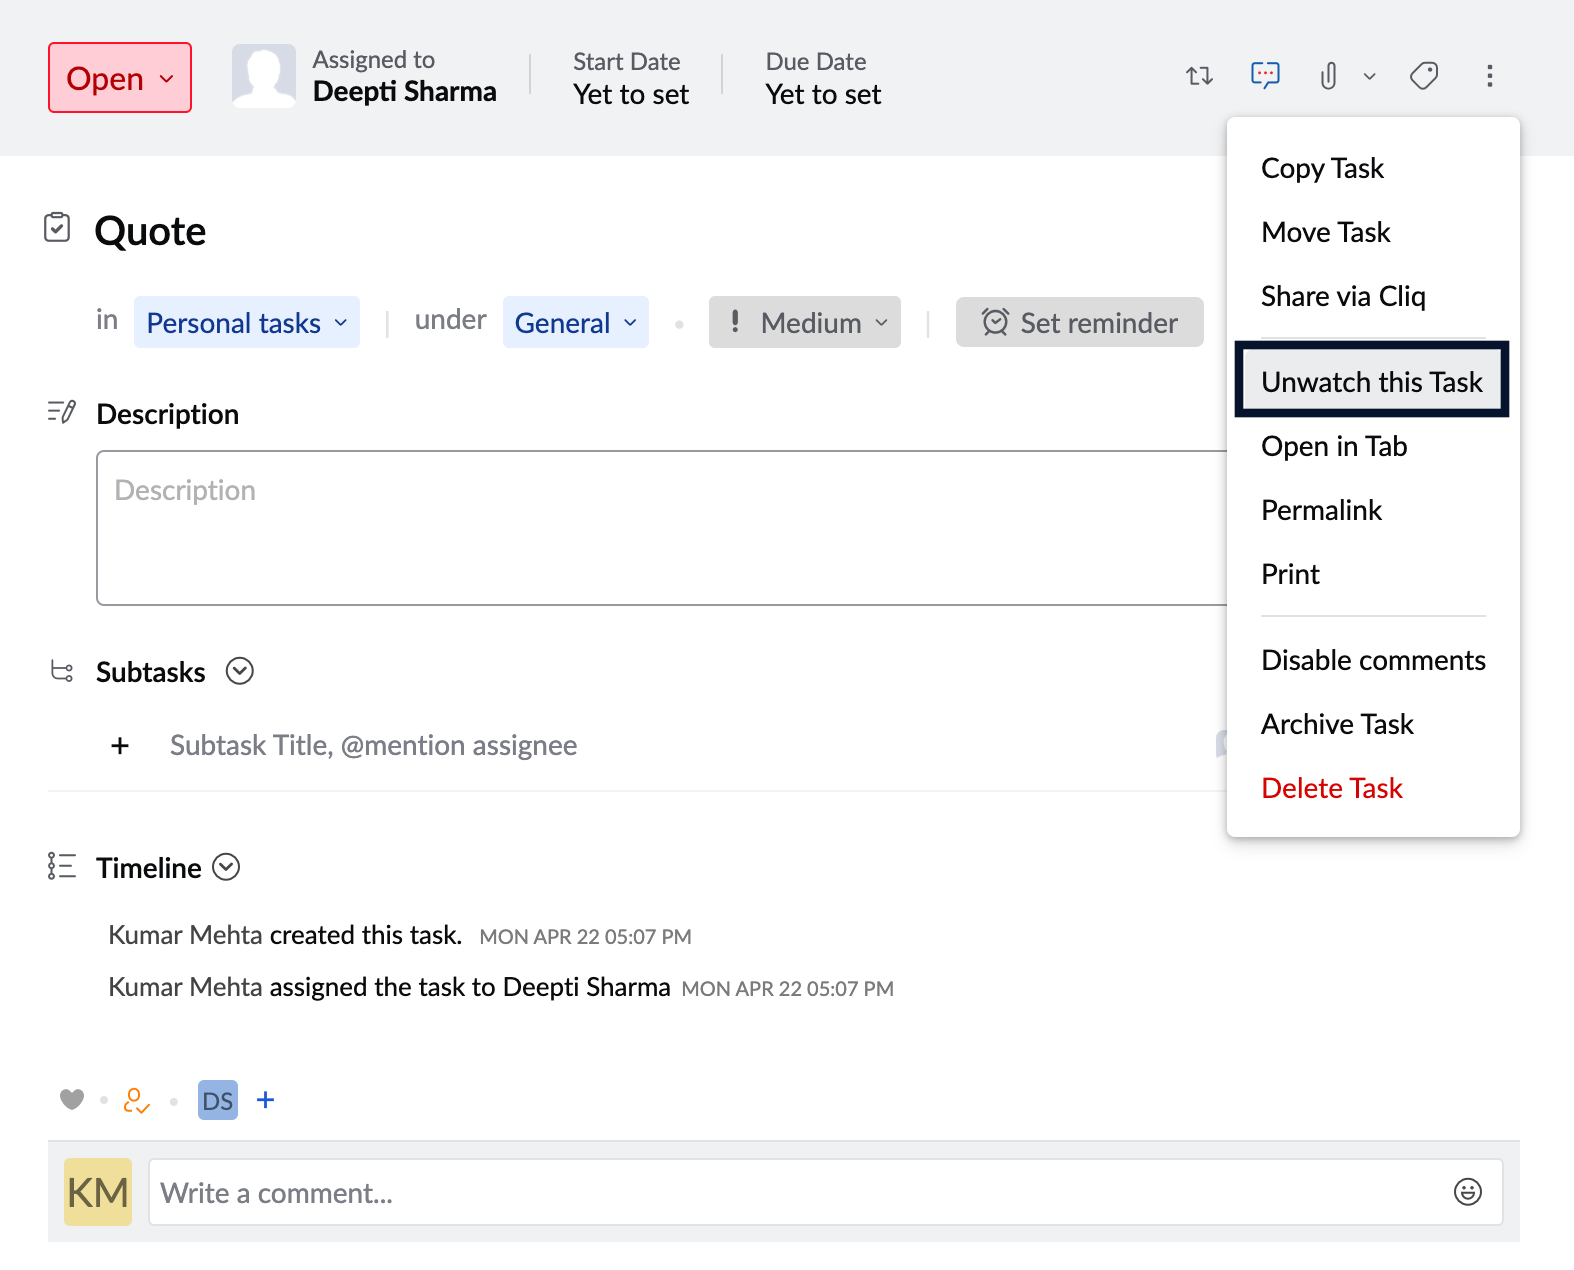
When you unwatch a task, you will not receive any notifications related to that task. To watch or unwatch a task,
- Login to https://mail.gov.in/ and navigate to Tasks.
- Open the task you want to watch/unwatch.
- Click the More Actions icon and select the Watch/Unwatch this task.
Other Actions
You can perform a few other operations by going to the More actions menu.
- Disable/enable comments - You can disable or enable comments for that particular task. When you disable comments, the comments section will not be available for that task.
- Share via Cliq - You can share your task via Zoho Cliq using this option. This is particularly helpful when you want to start an extended discussion.
- Permalink - This option will copy the link of your task to your clipboard.
Bulk Actions
Other than performing operations using the More Actions menu, you can also perform bulk actions in the task view pane itself. To perform bulk actions,
- Login to https://mail.gov.in/ and navigate to Tasks.
- Select the tasks you want to make changes to.
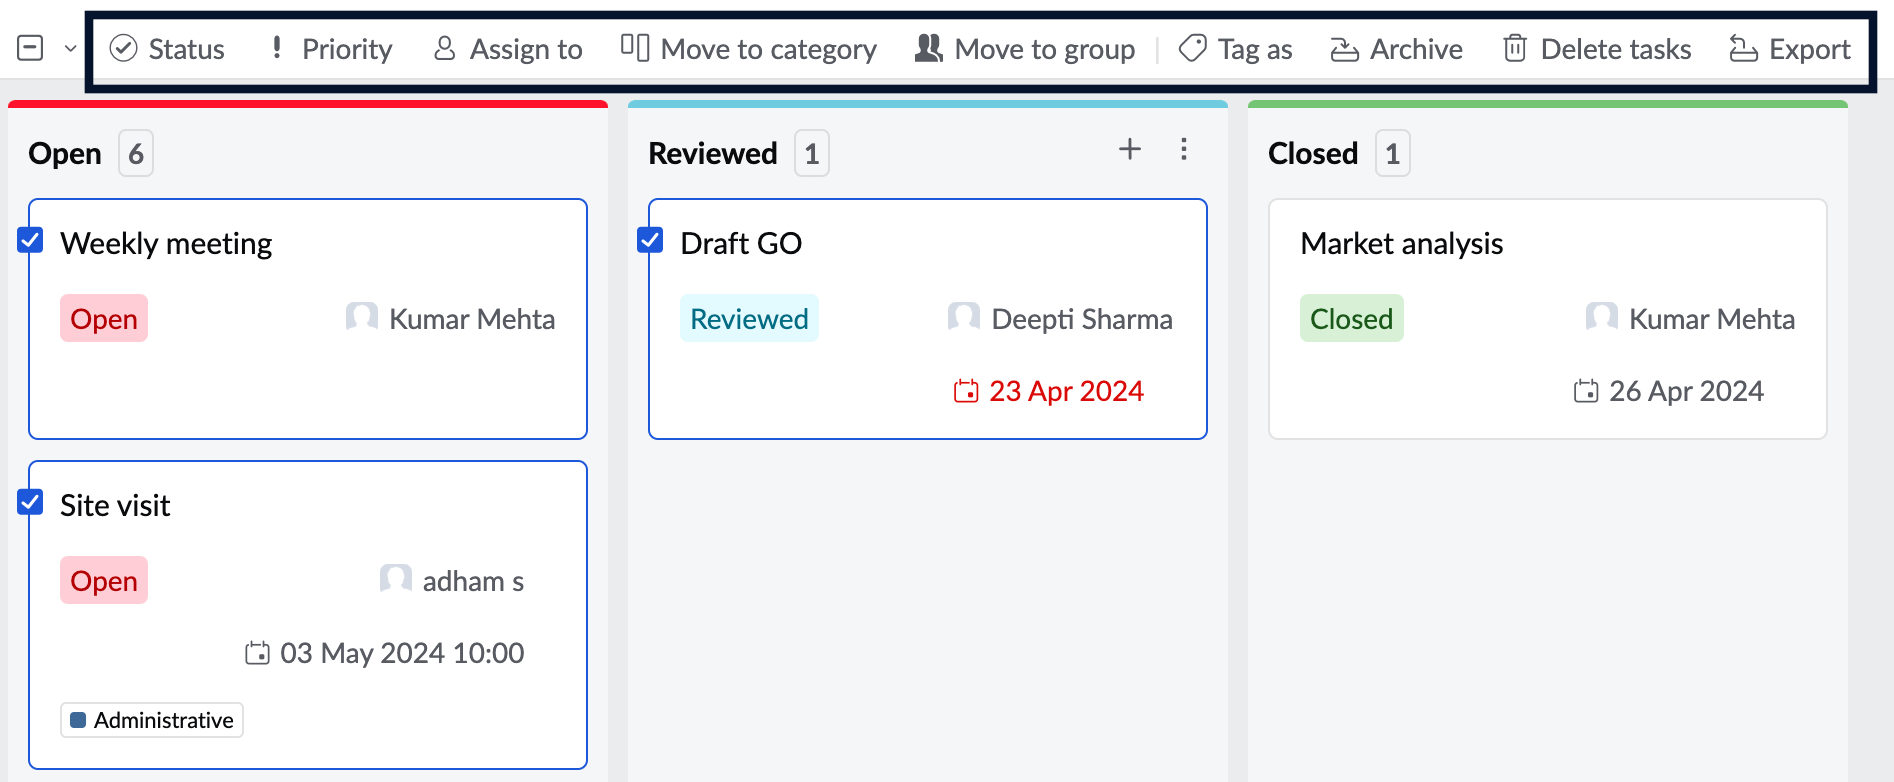
Using the Bulk Actions menu, you can perform actions such as changing priority, category, assignee, and status of multiple tasks in a single go. Apart from that, you can also tag, delete, archive, and export multiple tasks.