Add Users in NICeMail
As a Delegated Administrator in NICeMail services for a Government Ministry/Department or Public Sector Undertaking (PSU), you can add new users to your organization. The process differs depending on whether you are part of a Government Ministry/Department or a Public Sector Undertaking (PSU).
This guide explains both methods in a clear, step-by-step manner.
Adding Users to Government Ministries / Departments (via eForms)
In the NICeMail of Ministries/Departments, you cannot directly add users from the NICeMail Admin Console. Instead, new user account creation are requested by the users themselves through the eForms platform. Once submitted, you can review and process the requests as the Delegated Admin.
- First-time setup → One-Time Authentication is required.
- Subsequent logins → No Authentication is needed in NICeMail Services from eForms portal. If you haven't accessed the Admin Panel in eForms portal for 7 days continuously, you'll be required to Authenticate Yourself on New Email Platform again.
Note
- Ensure that your device is connected to the ZScaler Client Connector app before accessing the eforms platform.
- Make sure you have Delegated Admin privileges to access the Delegated Admin Panel in eForms portal.
- If you do not have Delegated Admin privileges in the eForms platform, please reach out to eforms@nic.in.
Accessing eForms to Add Users
You can access the eForms portal in two ways:
- Via NICeMail Admin Console
- Login to your NICeMail services using your Delegated Administrator credentials.
- After logging in, click My Profile on the top-right corner and select Admin Console to access the Admin Console dashboard.
- Select Users in the left pane.
- Click Add on the top menu.
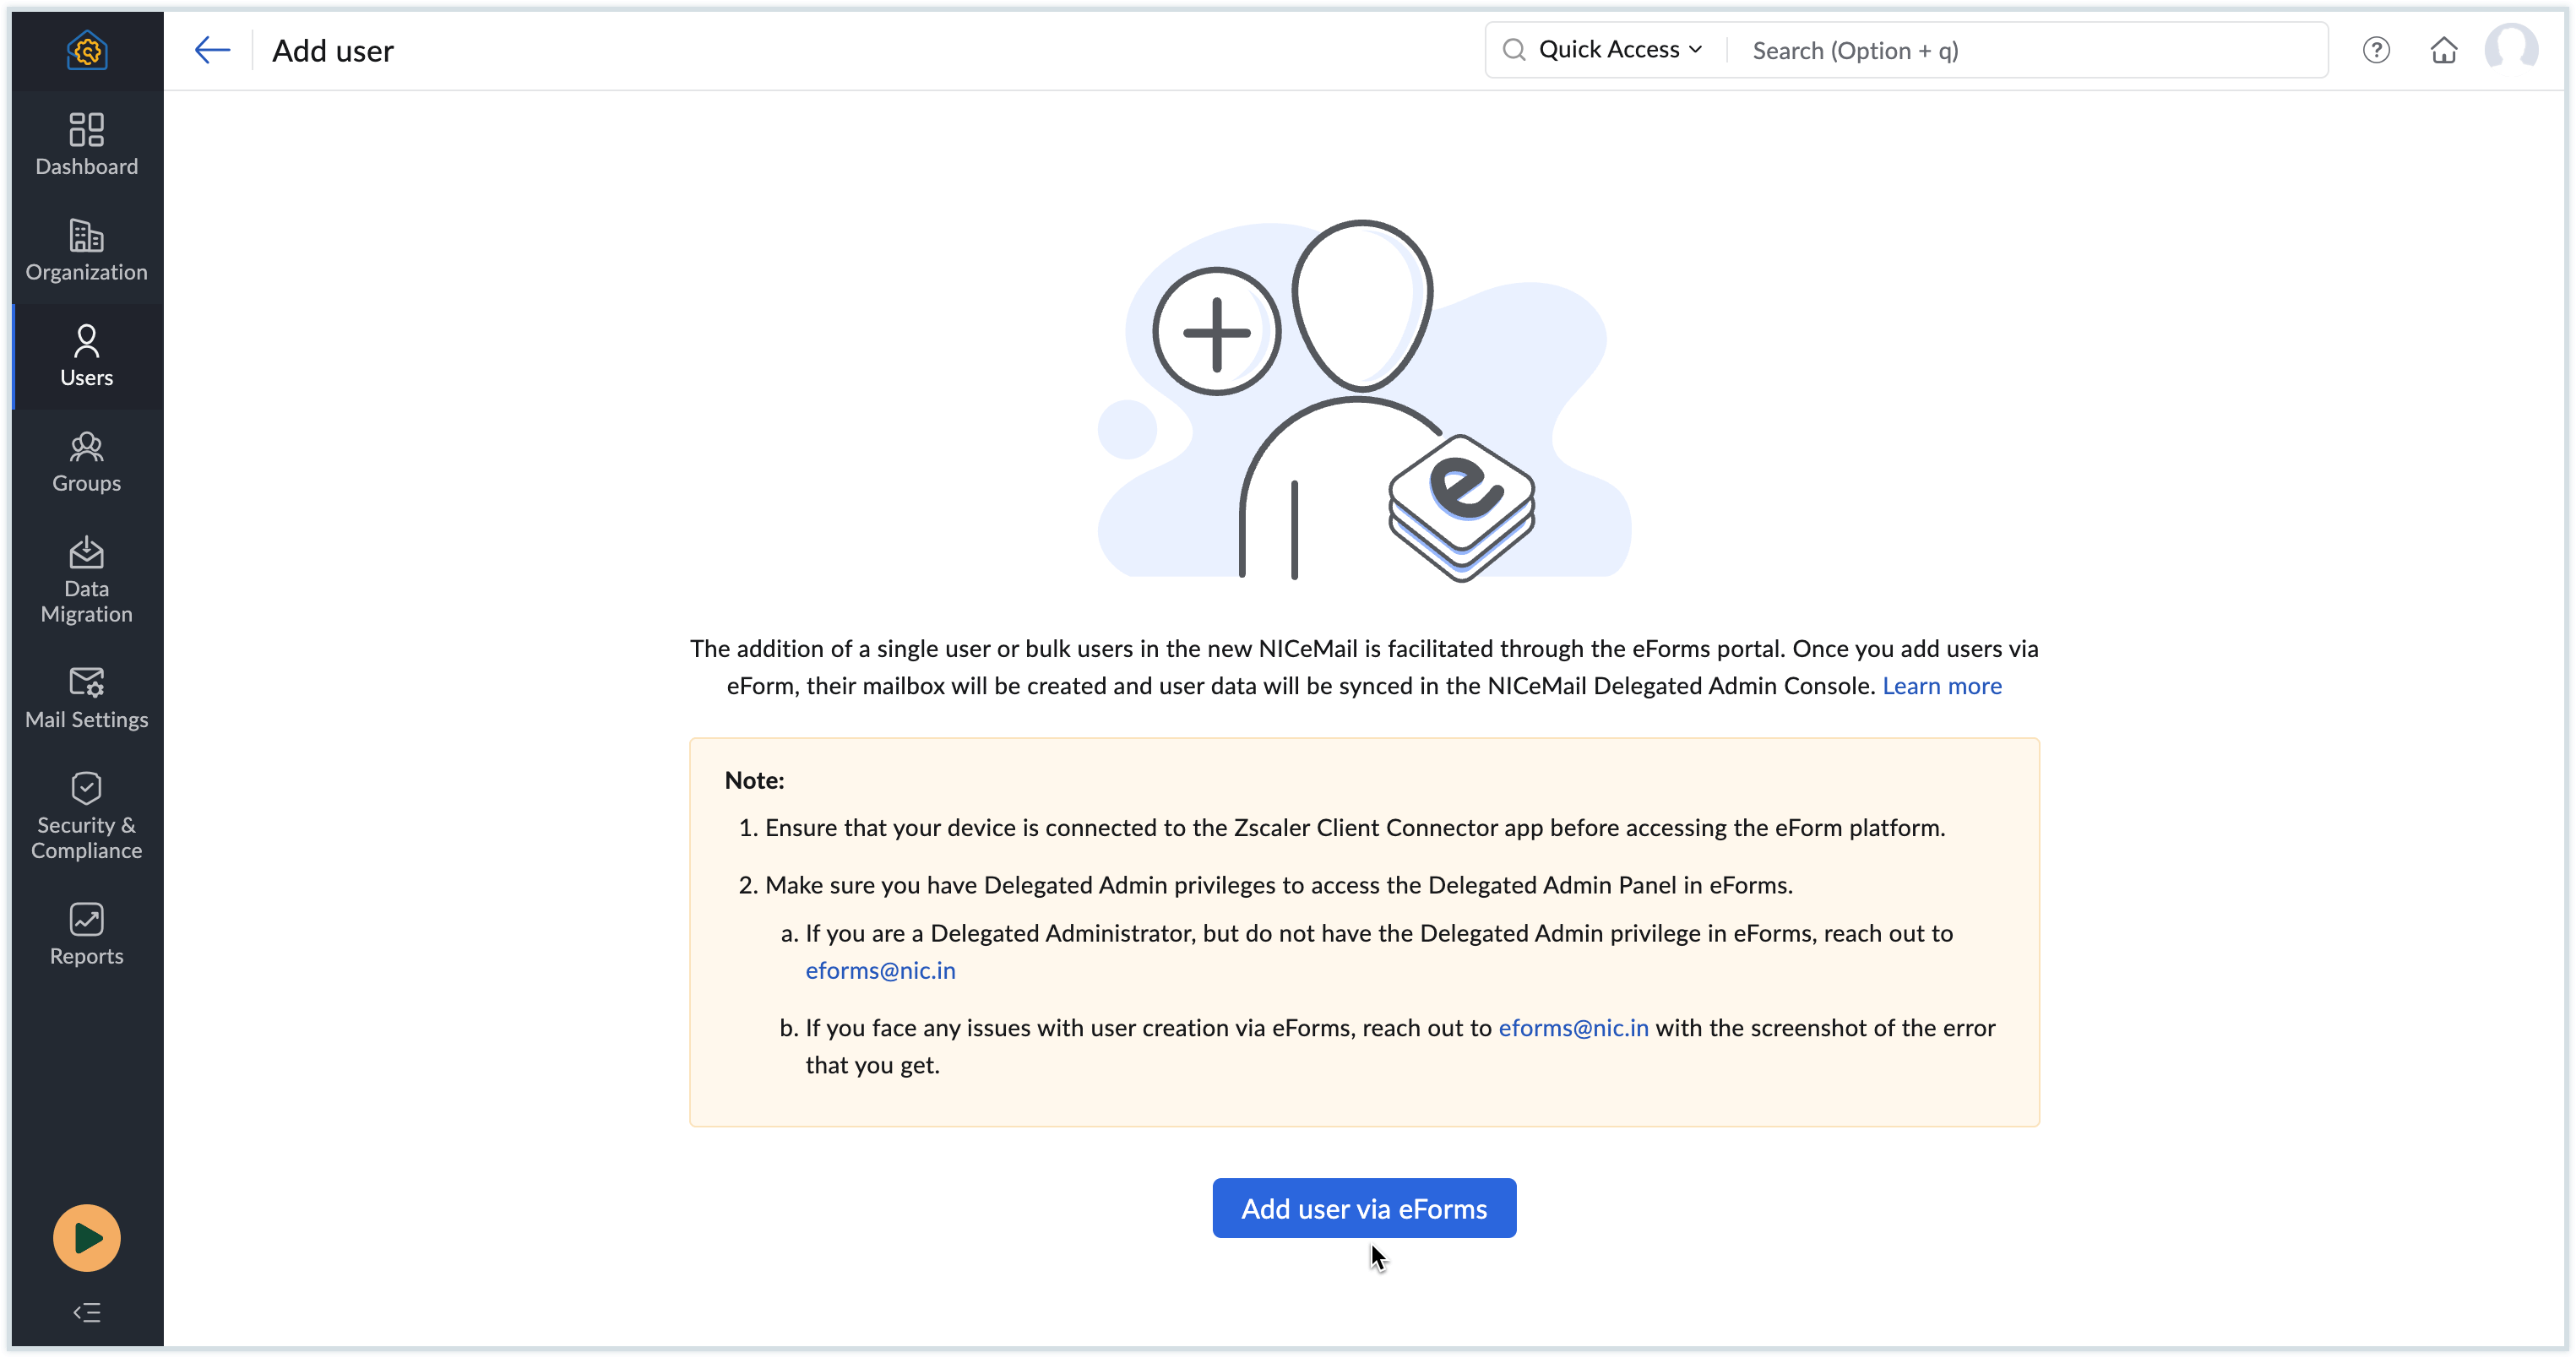
- Click Add user via eForms.
You will be redirected to the login page of eForms portal.
- Direct Login
Go to eForms portal and login with your NICeMail credentials.
First-Time Sign-in and Authentication
If you are accessing eForms for the very first time to approve user creation requests, you’ll need to complete a one-time authentication. Once this is done, you will not be asked to Authenticate Yourself on New Email Platform again in future logins.
Note
If you haven't accessed the Admin Panel in eForms portal for 7 consecutive days, you will be required to authenticate yourself again the next time you sign in.
- Login to your NICeMail services using your Delegated Administrator credentials.
- After logging in, click My Profile on the top-right corner and select Admin Console to access the Admin Console dashboard.
- Select Users in the left pane.
- Click Add on the top menu. You will be redirected to the login page of eForms portal after clicking Add user via eForms.
- Log in to eForms portal using your NICeMail services account.

- Navigate to the Delegated Admin Panel under Dashboards in the left pane.

To accept account creation requests, you will be required to authenticate yourself on the eForms platform using the Delegated Administrator credentials.
- Click the Authenticate Yourself on New Email Platform button.
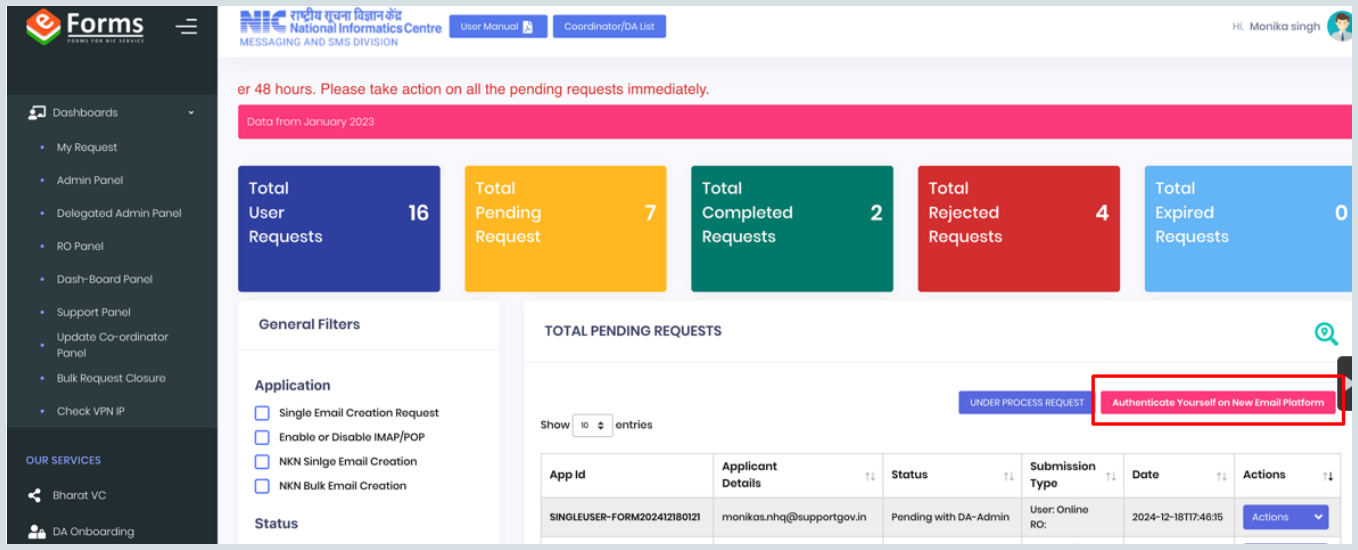
- You’ll be redirected to the NICeMail Services login page.
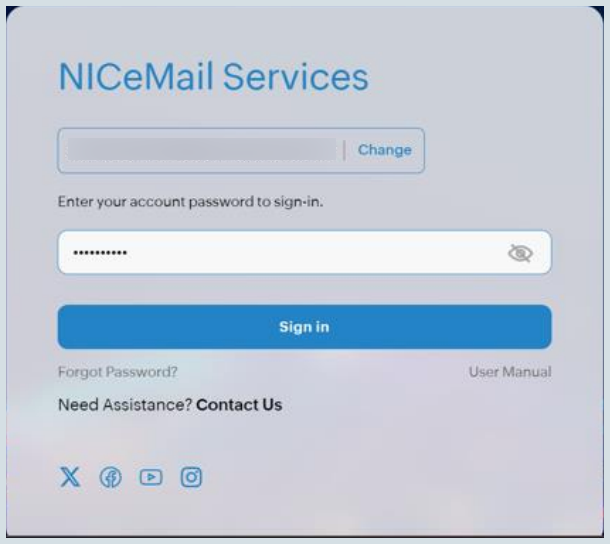
- Enter your account credentials and login.
- Once successfully authenticated, you’ll be redirected to the Delegated Admin Panel in eForms.
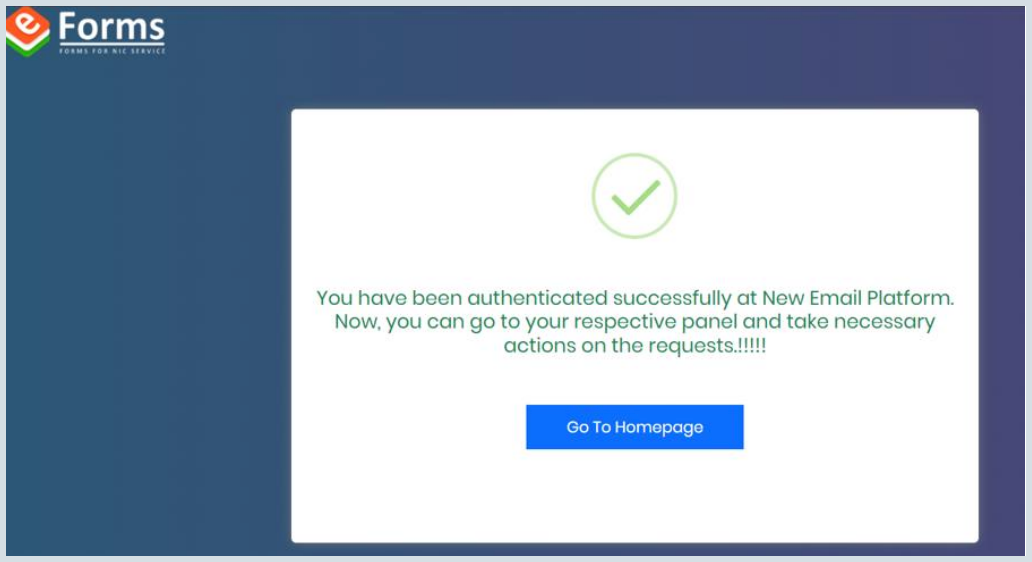
Note
This is a one-time authentication process, you will not be prompted to Authenticate Yourself on New Email Platform again.
- Click the Authenticate Yourself on New Email Platform button.
- Select Delegated Admin Panel from the left pane if not already open.
- You will see a list of single or bulk user account creation requests submitted by users that are currently pending action.
- You can also use the General Filters section to filter and refine your request list.
- Click the Action button next to the request you want to process and select Create ID / Mark as Done to proceed.
- Fill in the Remarks column if needed, and then click Create ID.

- You will receive a pop-up confirming that your request has been received successfully.

- In the pop-up, click Click here for Details to view the request details.
- To view the status of your requests, click Under Process Requests in the Delegated Admin Panel.
- To track a specific request, click the Track icon in the Action column next to the preferred request.
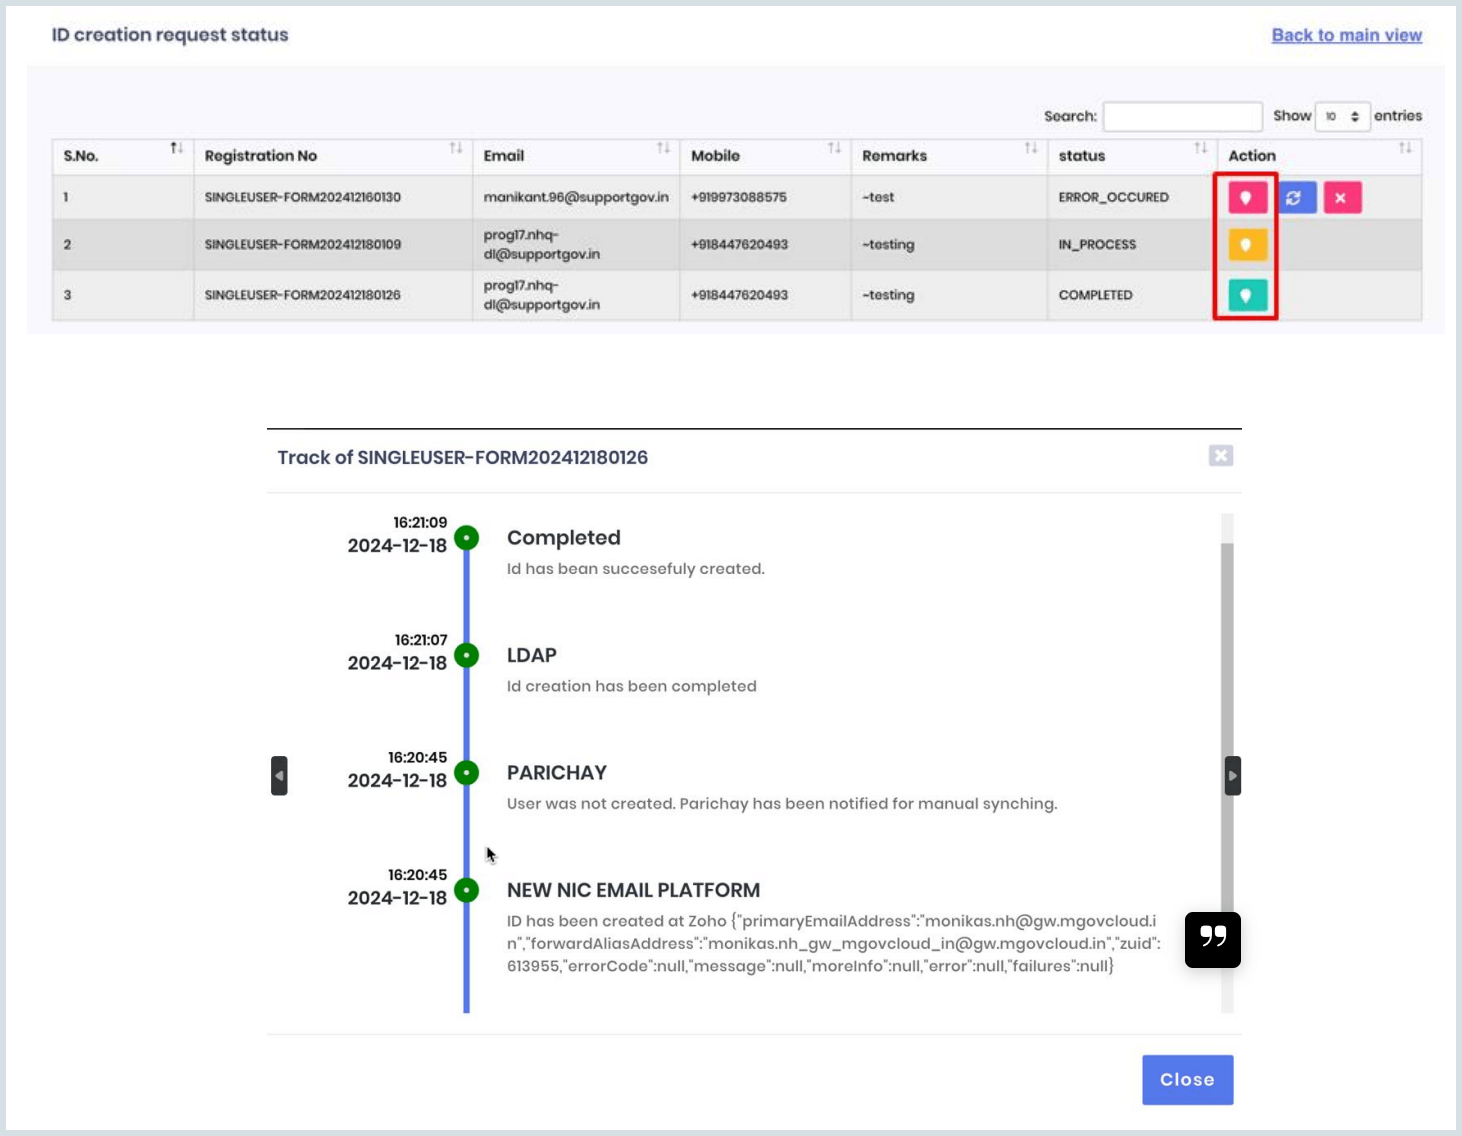
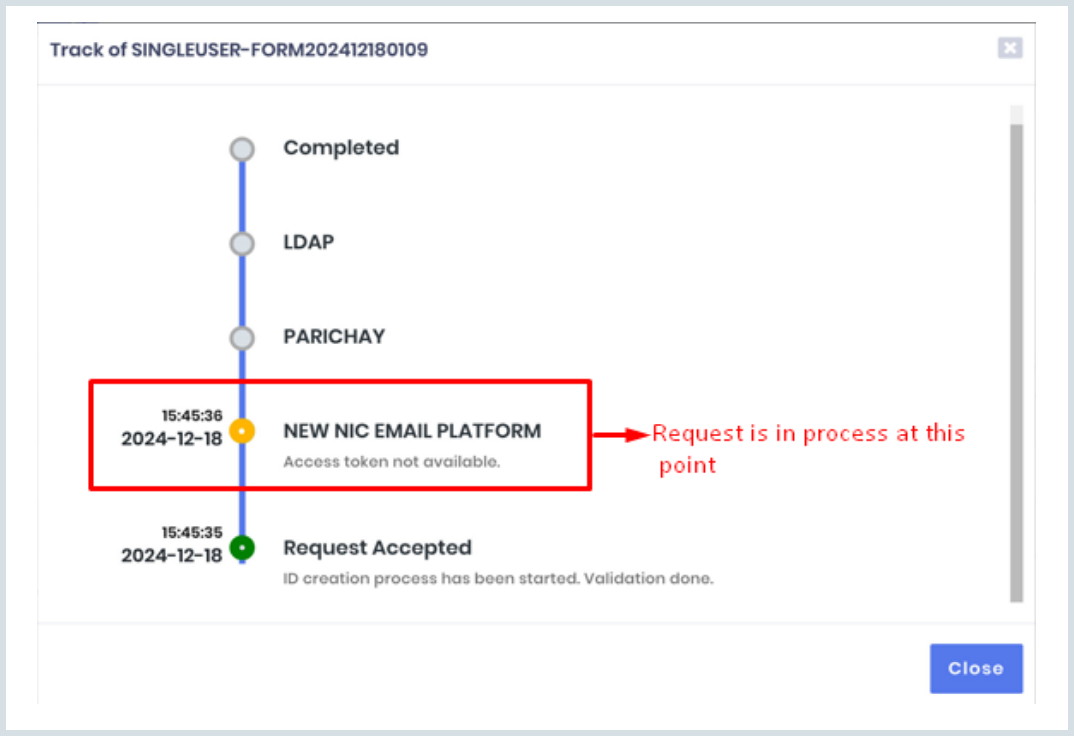
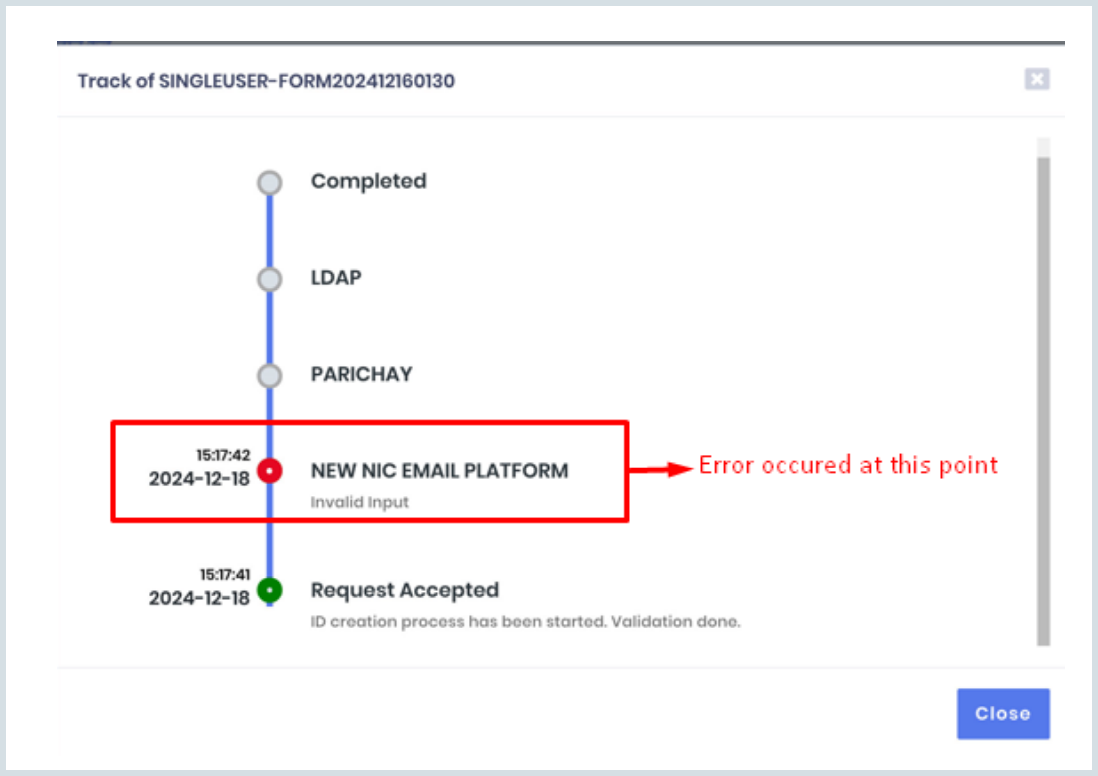
Once the request has been successfully completed, all stakeholders and the user(s) will be notified via email and SMS about the successful creation of the email ID.
Note
In the case of bulk user creation requests, follow the same steps as mentioned above. These requests are also processed similarly, and relevant updates and notifications will be sent accordingly.
Managing User Requests for Subsequent logins
From the subsequent login onwards, log in to the eForms portal and navigate to the Delegated Admin Panel in the dashboard to manage user creation requests.
- Login to your NICeMail services using your Delegated Administrator credentials.
- After logging in, click My Profile on the top-right corner and select Admin Console to access the Admin Console dashboard.
- Select Users in the left pane.
- Click Add on the top menu.
- click Add user via eForms.
You will be redirected to the login page of eForms portal.
- Log in to eForms portal using your NICeMail services account.

- Navigate to the Delegated Admin Panel under Dashboards in the left pane.

- You will see a list of single or bulk user account creation requests submitted by users that are currently pending action.
- You can also use the General Filters section to filter and refine your request list.
- Click the Action button next to the request you want to process and select Create ID / Mark as Done to proceed.
- Fill in the Remarks column if needed, and then click Create ID.

- You will receive a pop-up confirming that your request has been received successfully.

- In the pop-up, click Click here for Details to view the request details.
- To view the status of your requests, click Under Process Requests in the Delegated Admin Panel.
- To track a specific request, click the Track icon in the Action column next to the preferred request.


Once the request has been successfully completed, all stakeholders and the user(s) will be notified via email and SMS about the successful creation of the email ID.
Note
In the case of bulk user creation requests, follow the same steps as mentioned above. These requests are also processed similarly, and relevant updates and notifications will be sent accordingly.
Adding Users to Public Sector Undertakings (via Admin Console)
As a Delegated Administrator in a Public Sector Undertaking (PSU), you can create user accounts directly from the NICeMail Admin Console.
Note
- Ensure you are logged in with your Delegated Admin credentials.
- Confirm that you have available licenses to add new users.
- If you want to add bulk users manually, you can send a complete user list to msiadmin@nic.in for account creation.
Steps to add new user accounts in Public Sector Undertakings Organisations
- Login to your NICeMail services using your Delegated Administrator credentials.
- After logging in, click My Profile on the top-right corner and select Admin Console to access the Admin Console dashboard and select Users in the left pane.
- Click Add on the top menu. The Add users page appears.
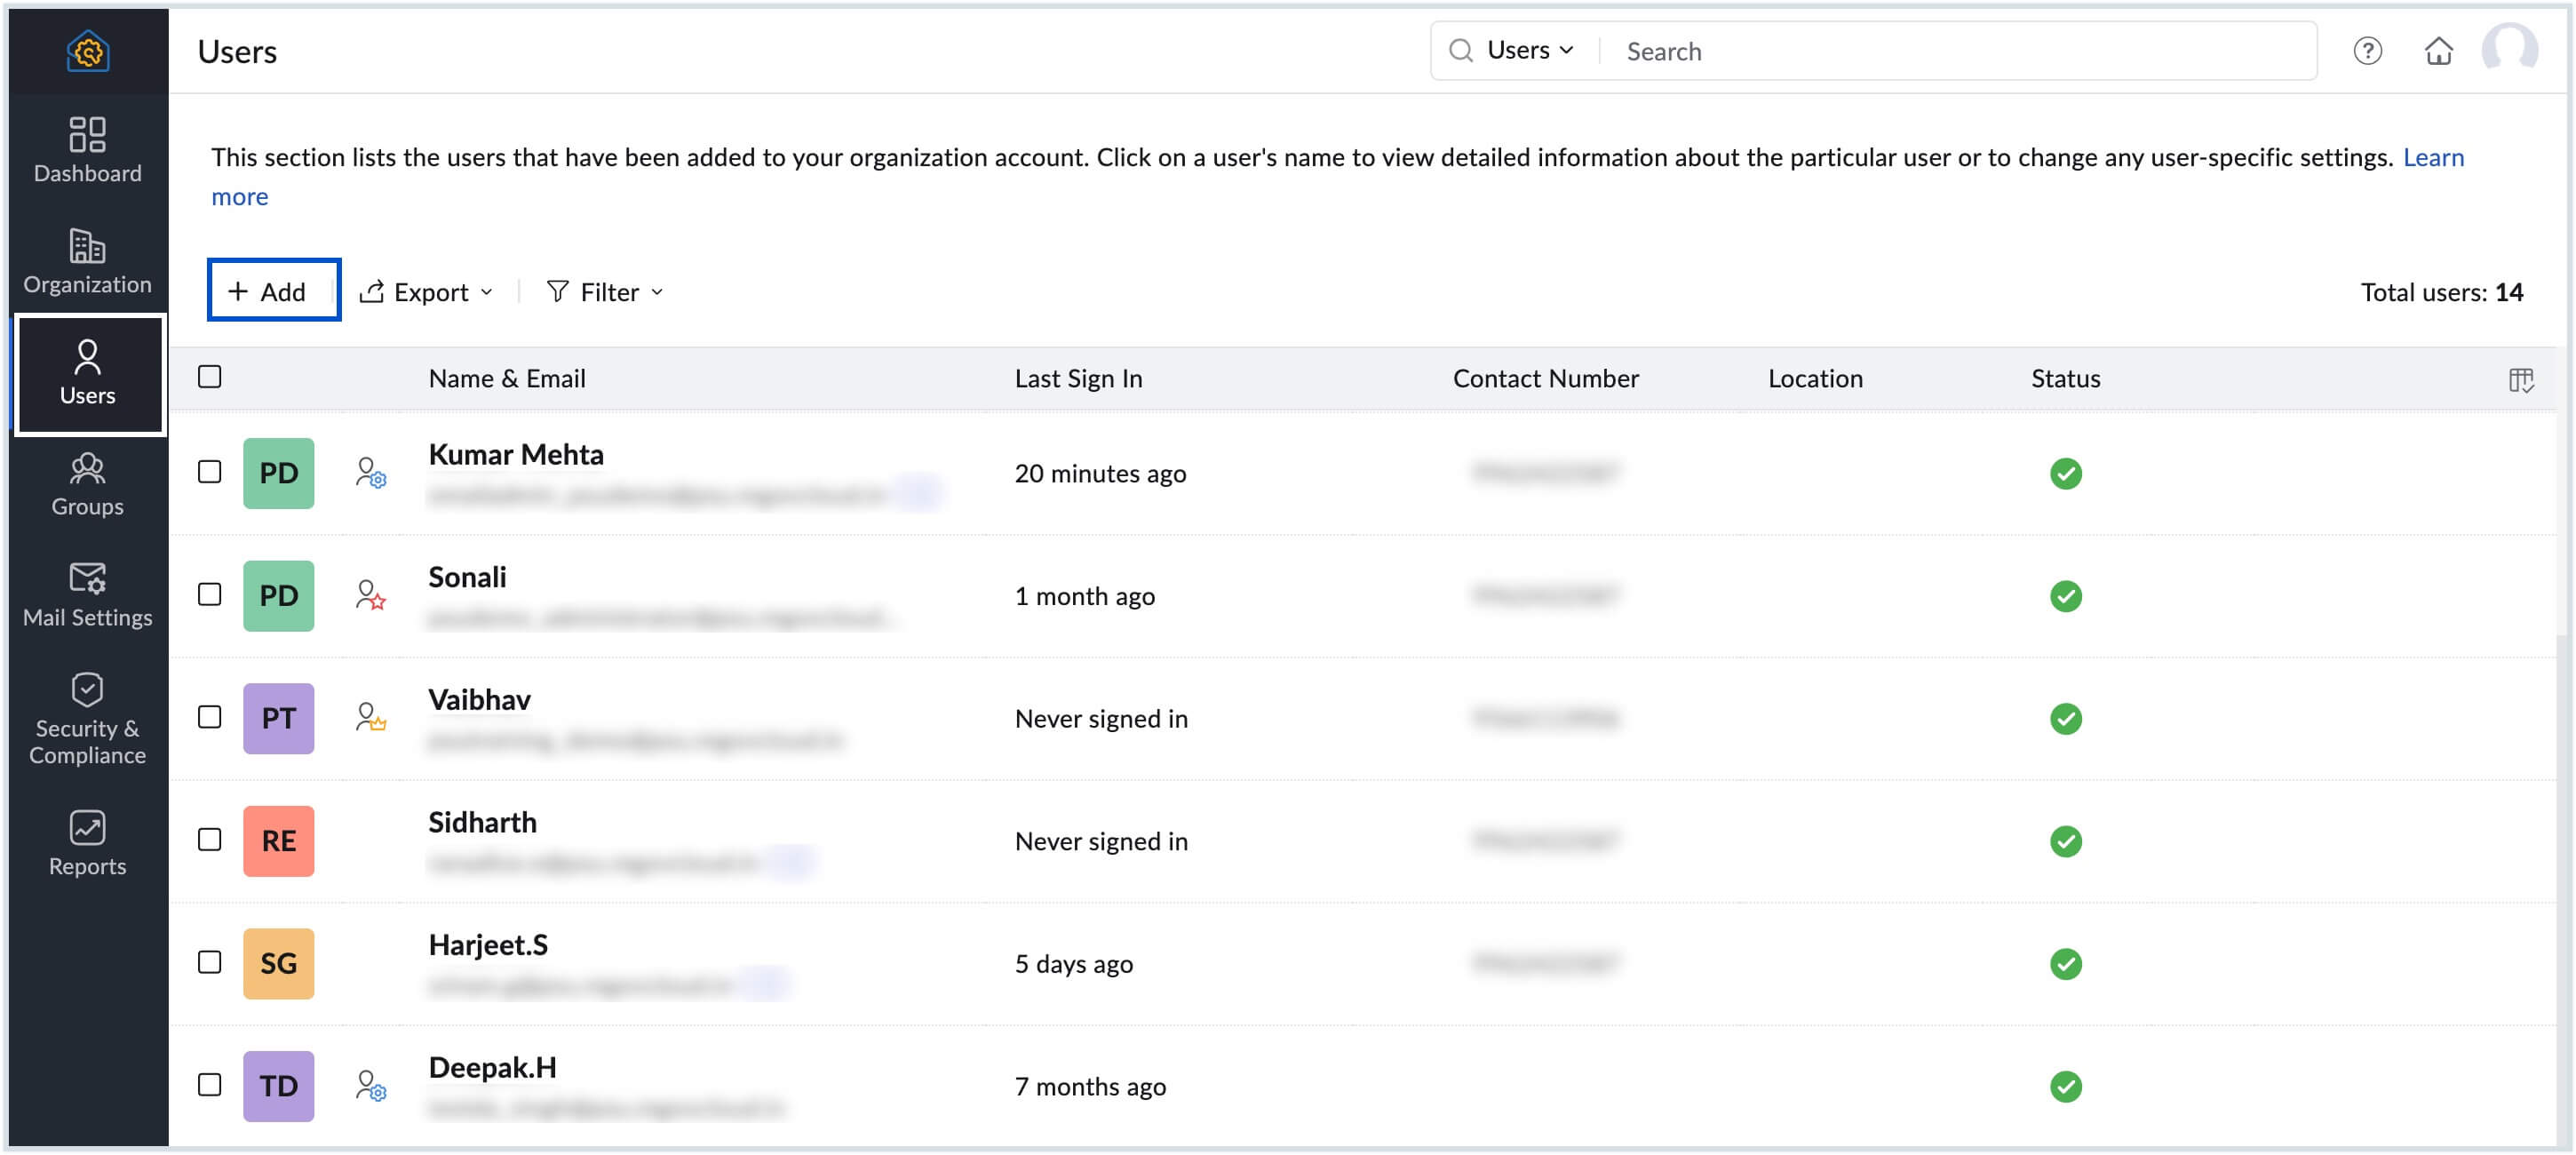
- Enter the user's First Name, Last Name in the respective fields.
- The Username will get filled automatically based on the Preferred Email Format set. Edit the Username field if required.
- If you have added multiple domains in your organization, select the domain in the drop-down for the user address to be associated with.
- You can either enter a New Password or click Auto-generate to automatically create a password for the user. The password must have a minimum of 8 characters, with one numeric character and one special character.
- Check the Force user to change password on first login option to prompt the user into changing the password set by you (admin) during his/her first login. If you check this option, users will not be able to access their mail account before changing their password.
- Select the appropriate License Type for the user based on the available licenses.
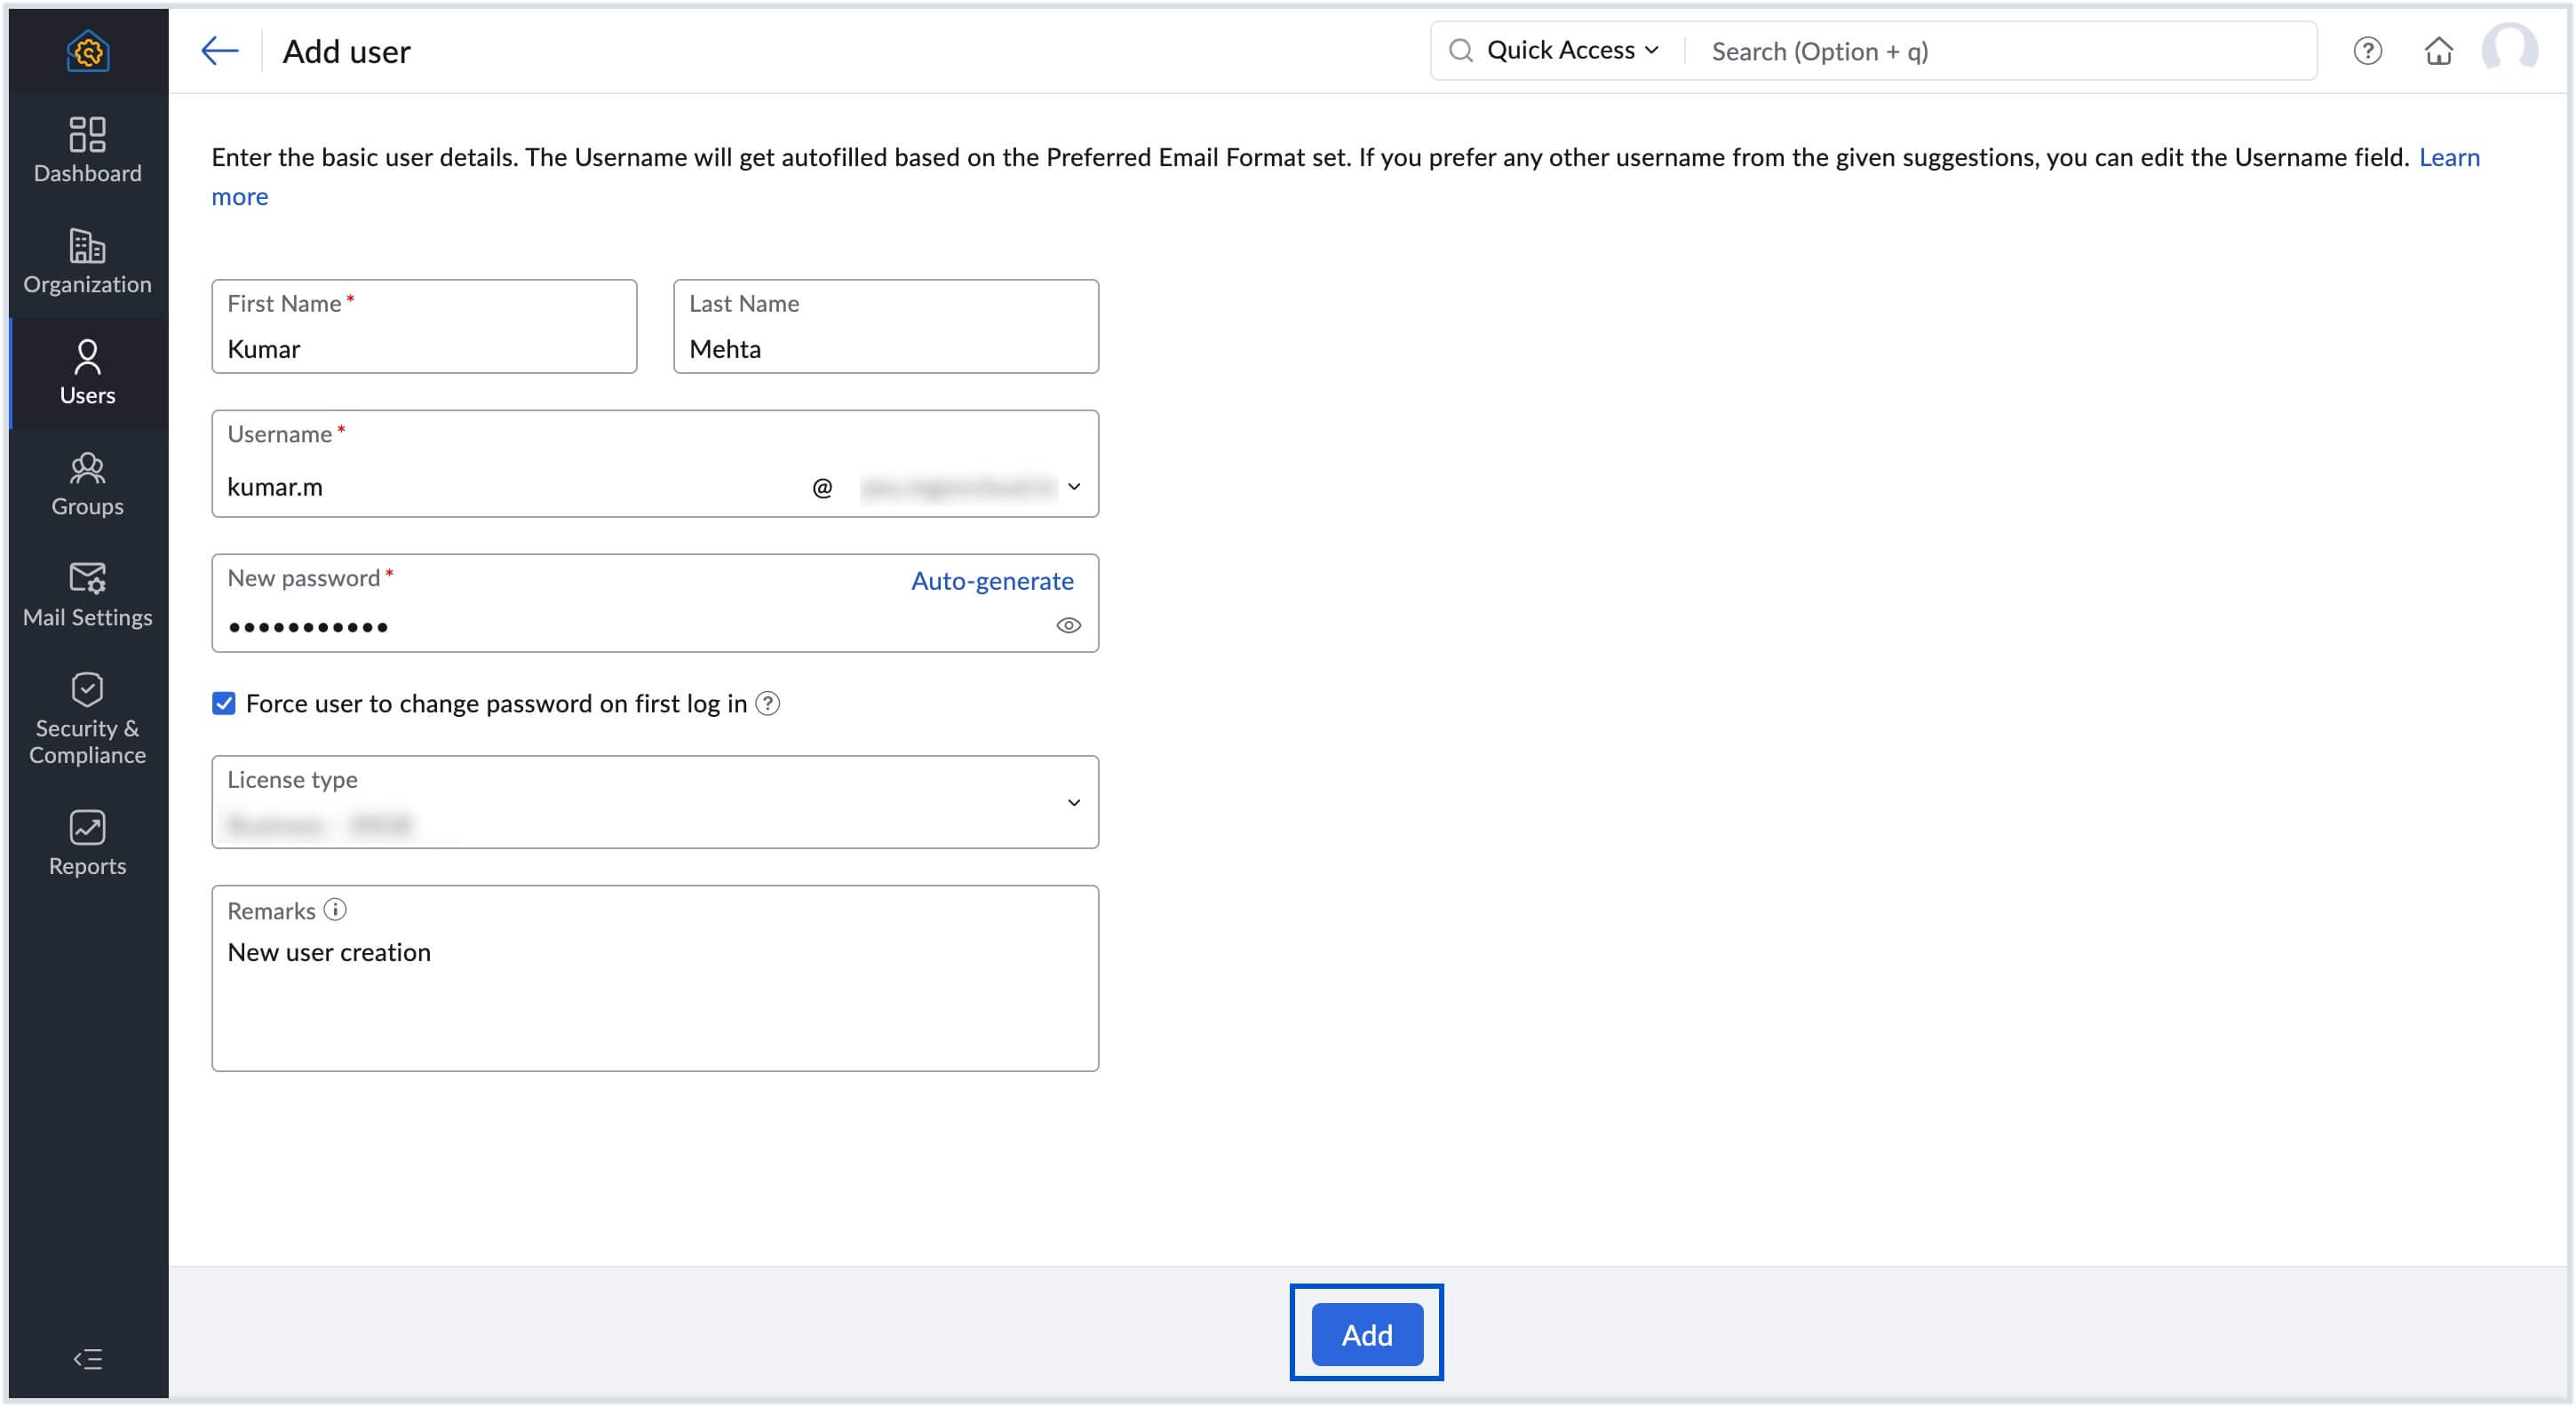
- Fill in the Remarks column if needed, and then click Add.
Update Recovery Mobile Numbers
After a user account is created, a recovery mobile number must be added to the user's account. The recovery number is mandatory as it acts as a two-factor authentication (TFA) for the user to login to the NICeMail account.
To set/update a user's recovery phone number, follow these steps:
- Login to your NICeMail services using your Delegated Administrator credentials.
- After logging in, click My Profile on the top-right corner.
- Select Admin Console to access the Admin Console dashboard and navigate to Users section in the left pane.
- Search and navigate to the user you want to add recovery mobile number.
- On the user's info page, navigate to Security.
- In the left pane, click on Recovery Mobile Numbers to view the recovery mobile numbers associated with the selected user.
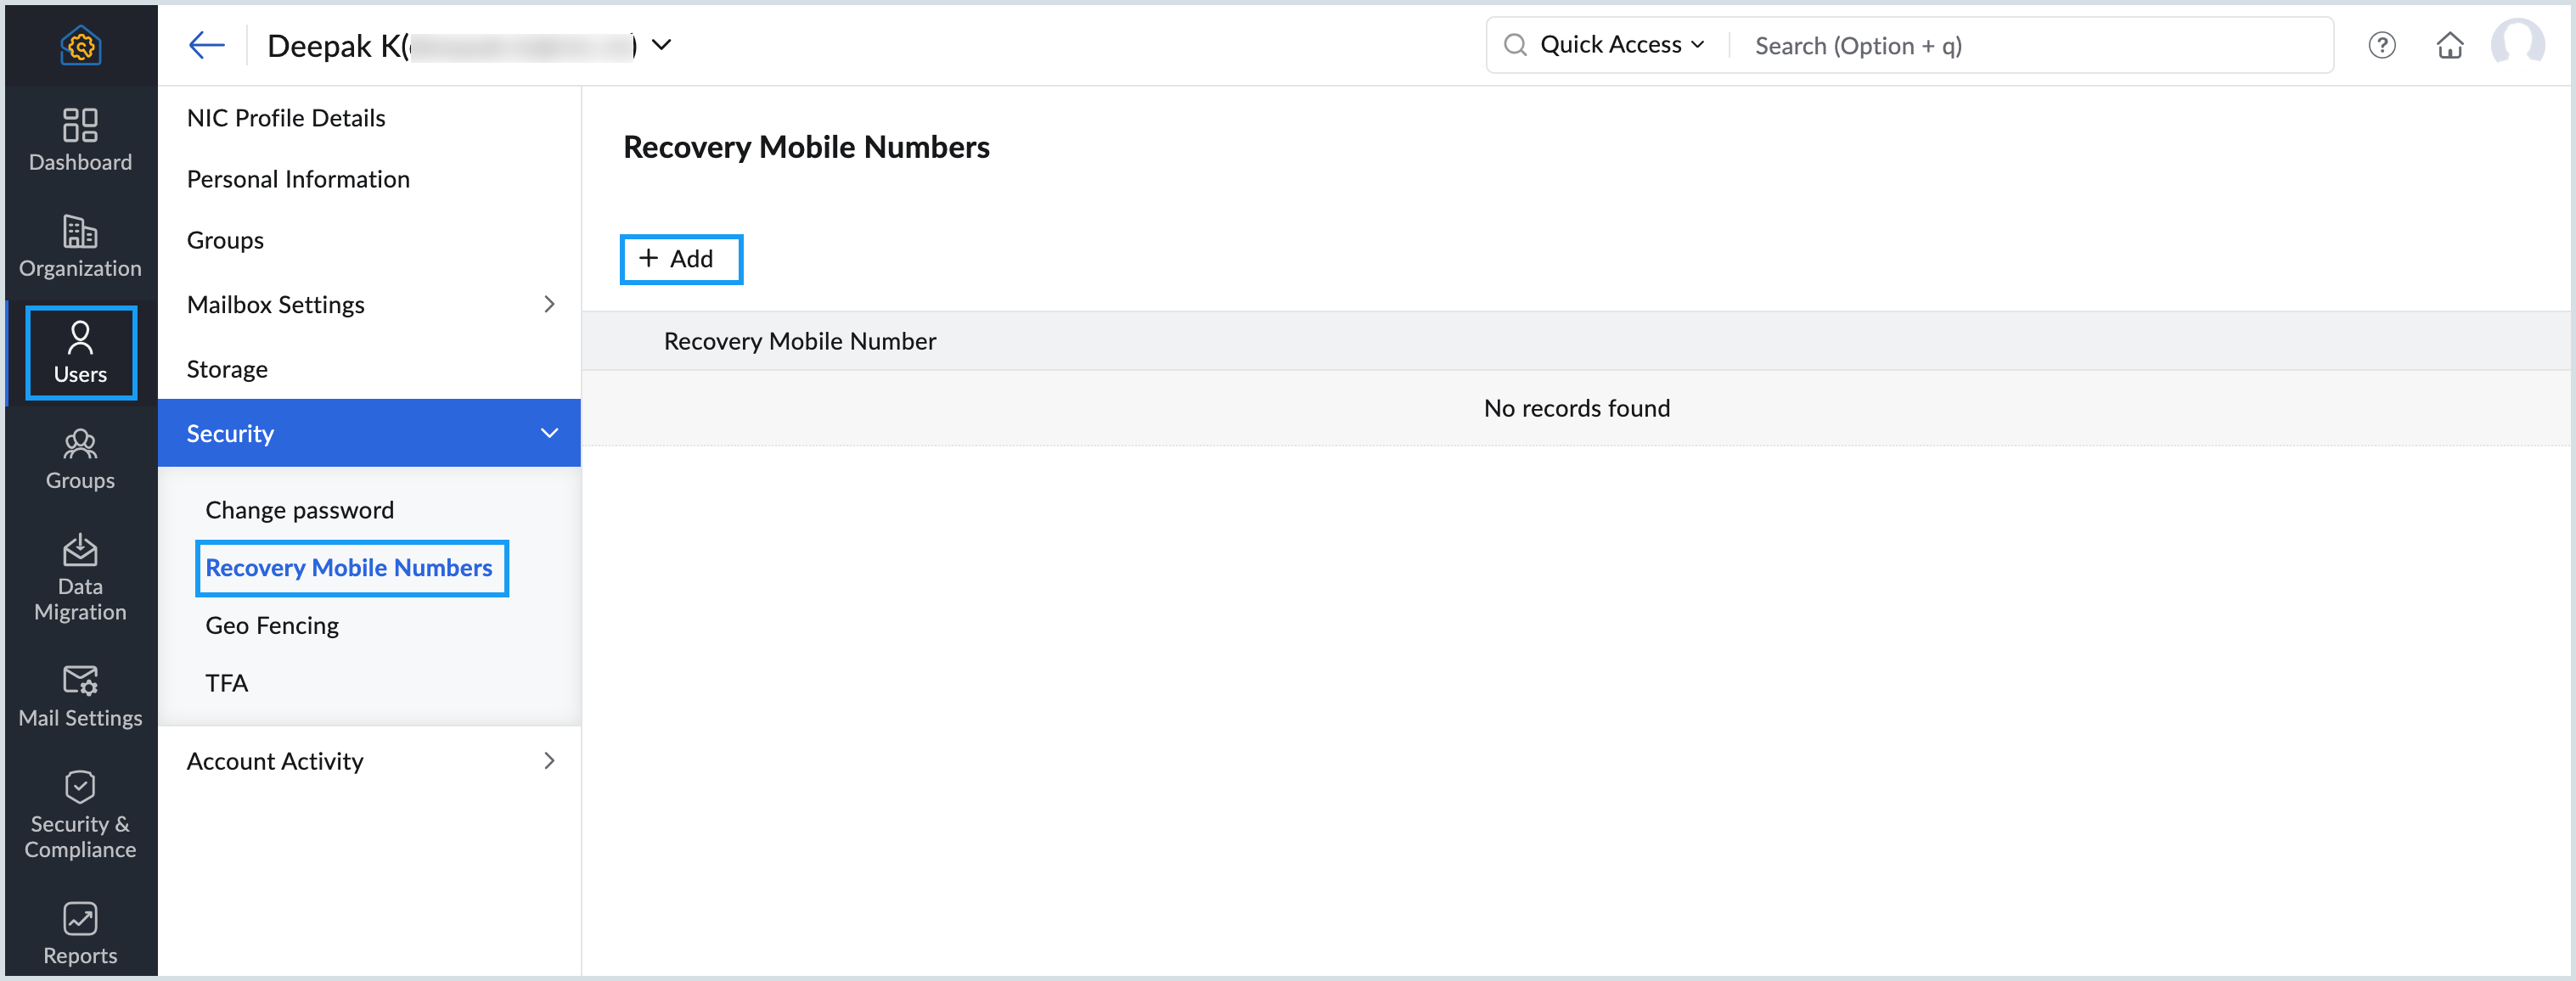
- Click the Add button to add a new recovery mobile number.
- Enter the new mobile number and select the Set as contact number checkbox.
- Click Add.
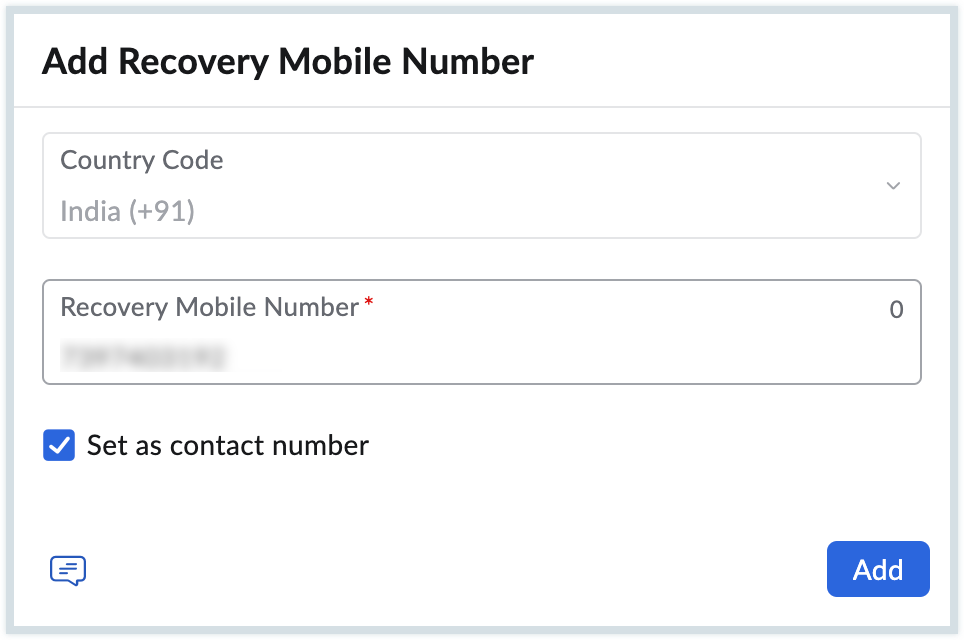
- Enter your account credentials to confirm the update. The recovery mobile number for the selected user will be updated accordingly.
Note
- The registered recovery mobile number will be used for two-factor authentication (TFA), login verification, and account recovery.
- The users will receive SMS OTPs on this registered mobile number whenever they are trying to login to their NICeMail Services.
Once done, the user account will be created and added to the department. The newly created user can then log in using their assigned email address and the configured password. If the Force password change on first login option was enabled, users will be prompted to reset their password upon initial sign-in.
Need Help?
If you face any issues while adding users in NICeMail, you can reach out to the respective Helpdesk teams for assistance:
For Government Ministries/Departments:
Email: helpdesk-email@gov.in
For Public Sector Undertakings (PSUs):
Email: helpdesk-psuemail@nic.in
Make sure to include details such as your organization name, Delegated Admin email ID, and a brief description of the issue when contacting the Helpdesk. This will help the team resolve your query faster.